Sharp AL-1552 (serv.man8) Service Manual / Parts Guide ▷ View online
AL-1552/AL-1553
DUPLEX-RELATED ITEMS
1 – 2
[ 2 ] DUPLEX-RELATED ITEMS
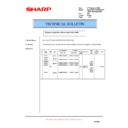
1. Motors and solenoids
No.
Part name
Control signal
Function/Operation
1
Main motor
MM
Drives the copier.
2
Scanner motor
MRMT
Drives the optical mirror base (scanner unit).
3
Toner motor
TM
Supplies toner.
4
Cooling fan motor
VFM
Cools the optical section.
5
Resist roller solenoid
RRS
Resist roller rotation control solenoid
6
Paper feed solenoid
CPFS1
Cassette Paper feed solenoid 1
7
Multi paper feed solenoid
MPFS
Multi manual pages feed solenoid
8
SPF motor
SPFM
Drives the single pass feeder
9
Duplex motor
DMT
Devices the duplex paper transport section
10
Original feed solenoid
SPUS
Original feed solenoid
11
Paper feed solenoid
CPFS2
Cassette Paper feed solenoid 2
12
SPF resist roller solenoid
SRRS
Original resist roller solenoid
13
SPF paper feed solenoid
SPFS
Original paper feed solenoid
3
9
2
13
8
12
10
4
1
5
7
11
6
AL-1552/AL-1553
DUPLEX-RELATED ITEMS
1 – 3
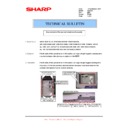
2. Duplex motor section (Duplex model only)
A. Remove the rear cabinet.
1) Remove four screws.
2) Remove the rear cabinet.
B. Remove the main PWB.
1) Disconnect each connector.
2) Remove four screws, and remove the MCU PWB.
3) Disconnect the connector.
4) Remove five screws, and remove the I/F PWB.
C. Remove the Duplex motor.
1) Remove two screws.
2) Remove the Duplex motor cover.
3) Remove the Duplex motor.
Note: When reassembling, be sure to engage the Duplex motor gear
with the belt on the main body side.
3. Reverse roller section (Duplex model only)
A. Remove the reverse unit.
1) Remove four screws.
2) Remove the spring, and the earth wire.
3) Remove the reverse unit.
B. Remove the reverse roller.
1) Bend the reverse roller and remove it.
1)
1)
1)
1)
1)
1)
1)
1)
2)
2)
2)
3)
1)
1)
2)
2)
2)
1
2
3
1
1
2
3
1
AL-1552/AL-1553
DUPLEX-RELATED ITEMS
1 – 4
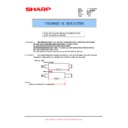
4. Duplex adjustment
A. Adjusting the paper reverse position in memory
for duplex copying
This step adjusts the front surface printing (odd-number pages of a doc-
ument set) in the S-D mode copying and the leading edge position of an
image on even-number pages in the D-S mode.
That is, it covers the adjustment of the second surface printing mode
That is, it covers the adjustment of the second surface printing mode
(image loss at the front edge of an image) in which image data is once
stored in memory.
The image data is read, starting from its front end in the document deliv-
The image data is read, starting from its front end in the document deliv-
ery direction (Reference direction of document setting in the OC
mode)and stored in memory.
This stored image data is printed starting at the printing start position, in
This stored image data is printed starting at the printing start position, in
the order of last-stored data to the first-stored data.
In other words, the front edge image loss of the image can be adjusted
by changing the document read end position.
by changing the document read end position.
(Adjustment procedure)
1) Preparing test chart (Draw a scale at the rear end of one side of a
sheet of A4 white paper or letter paper).
2) Set the test chart so that the scale is positioned as shown below,
in the S-D mode.
3) Execute simulation 50-18 to make a copy and check the front edge
image loss at the area where the scale is printed.
Adjust the setting so that the front edge image loss is less than 4.0
mm in the Duplex mode.
An increase of 1 in setting represents an increase of 0.1 mm
An increase of 1 in setting represents an increase of 0.1 mm
in image loss.
B. Adjusting trailing edge void in duplex copy mode
This is the adjustment of the first surface printing mode (rear end void)
in duplex copying.
In a duplex copying operation, the paper is delivered starting from the
rear end of the first printing surface. It is therefore necessary to make a
void area at the rear end on the first printing surface to prevent paper
jam at the fusing part.
Adjustment modes:
in duplex copying.
In a duplex copying operation, the paper is delivered starting from the
rear end of the first printing surface. It is therefore necessary to make a
void area at the rear end on the first printing surface to prevent paper
jam at the fusing part.
Adjustment modes:
1) Paper trailing edge void quantity 50-19 (TEXT)
This adjustment is made when the cassette paper size is recog-
nized. The trailing edge void quantity can be adjusted by changing
nized. The trailing edge void quantity can be adjusted by changing
the trailing edge image laser OFF timing.
(Adjustment procedure)
(1) Paper trailing edge void quantity
(1) Paper trailing edge void quantity
1) Preparing test chart (Draw a scale at the rear end of one side of a
sheet of A/4 white paper or letter paper)
2) Set the test chart on the document glass as shown below.
3) Using the user simulation [18], set the paper size of the first cassette.
4) Execute simulation 50-19 to turn on the TEXT lamp and make the
printing mode in OC-D mode.
Make a copy of the test chart to check the void area of the scale on
the image.
Make a copy of the test chart to check the void area of the scale on
the image.
Adjust the setting so that the void area is 4 - 5 mm. An increase in 1
of setting represents 0.1 mm in void area.
of setting represents 0.1 mm in void area.
5 10
Scale (S-D mode)
5 10
The front edge of the
scale on test chart
Front edge of paper
Void area
less than 4 mm
• Letter paper
: 4
• A4 paper
: 3
2nd printing surface where scale is printed (lower side)
Document guide
The trailing edge has a scale
Table glass
The trailing edge void on the first printing surface is shown above.
Paper
Void position to be check
AL-1552/AL-1553
DUPLEX-RELATED ITEMS
1 – 5
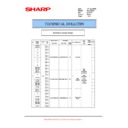
5. List of simulations
Sim
No.
Kind of
main code
Sub
code
Operation
01
Optical system
01
06
06
Mirror scan operation
Aging of mirror scanning
Aging of mirror scanning
02
SPF Individual
load operation
load operation
02
03
04
04
SPF sensor status display
Motor ON
Paper feed solenoid ON
Paper feed solenoid ON
05
Lamp ON check
01
02
03
03
Operation panel display check
Fusing lamp, cooling fan operation check
Copy lamp ON
Copy lamp ON
06
Machine
individual load
operation
individual load
operation
01
02
Paper feed solenoid ON
Resist solenoid ON
07
Aging
01
06
06
Warm-up display and aging with jam
Intermittent aging
Intermittent aging
08
High voltage
output check
output check
01
02
03
03
06
Developing bias
Main charger (Grid high)
Grid voltage (Low)
Grid voltage (Low)
Transfer charger
10
Other
None Toner motor aging
14
Trouble reset
None Cancel of troubles other than U2
16
U2 trouble reset None Cancel of U2 trouble
22
Counter display
04
05
05
08
12
14
14
17
18
19
19
21
22
JAM total counter display
Total counter display
Total counter display
SPF counter display
Drum counter display
P-ROM version display
P-ROM version display
Copy counter display
Printer counter display
Scanner mode counter display
Scanner mode counter display
Scanner counter display
SPF JAM counter display
24
Special counter
clear
clear
01
04
07
08
08
09
13
14
14
15
JAM total counter clear
SPF counter clear
Drum counter clear
Copy counter clear
Copy counter clear
Printer counter clear
Scanner counter clear
SPF JAM total counter clear
SPF JAM total counter clear
Scanner mode counter clear
25
Main motor ON
01
10
Main motor operation check (Cooling
fan motor rotation check)
fan motor rotation check)
Polygon motor ON
26
Various setup
01
02
03
04
06
07
20
30
38
39
40
42
43
44
62
63
Manual feed setup
(R) SPF setup
Second cassette setup
Machine duplex setup
Destination setup
Machine conditions check
Rear edge void setup
CE mark support control ON/OFF
Cancel of stop at drum life over
Memory capacity check
Polygon motor OFF time setup
Time required for turning OFF after
completion of printing)
Transfer ON timing control setup
Side void setup
SPF document rear edge read setup
Energy-save mode copy lamp setup
Fan control select setup
30
Sensor
operation check
(Standard
provision)
operation check
(Standard
provision)
01
Paper sensor status display
43
Fusing
temperature
setup
temperature
setup
01
04
04
05
09
Fusing temperature setup (Normal copy)
Fusing temperature setup 2
Fusing temperature setup 2
Fusing temperature setup in duplex
copy
Setup of fusing control of postcard size
Setup of fusing control of postcard size
paper
46
Exposure
adjustment
adjustment
01
02
02
18
19
20
20
29
31
32
32
Copy density adjustment (300dpi)
Copy density adjustment (600dpi)
Copy density adjustment (600dpi)
Image contrast adjustment (300dpi)
γ
table setup or AE operation mode setup
SPF exposure correction
Image contrast adjustment (600dpi)
Image sharpness adjustment
Copier color reproduction setup
Copier color reproduction setup
48
Magnification
ratio correction
ratio correction
01
Front/rear (main scanning) direction and
scan (sub scanning) direction
magnification ratio adjustment
magnification ratio adjustment
49
01
Flash ROM program writing mode
50
Lead edge
adjustment
adjustment
01
10
10
18
19
Lead edge image position
Center offset adjustment
Center offset adjustment
Memory reverse position adjustment
in duplex copy
Duplex copy rear edge void adjustment
Duplex copy rear edge void adjustment
51
Timing
adjustment
adjustment
02
Resist quantity adjustment
53
08
SPF scan position automatic adjustment
61
Laser system
operation
operation
03
Polygon motor check
(HSYNC output check)
63
Shading
01
Shading check
64
Self print
01
Self print
Sim
No.
Kind of
main code
Sub
code
Operation

