Sharp LL-H1513 (serv.man4) Service Manual ▷ View online
PC-UM10M
LL-H1513-E CONNECTION, ADJUSTMENT, OPERATION, AND FUNCTIONS
2 – 5
3. ADJUSTMENT
3-1. ADJUSTMENT METHOD
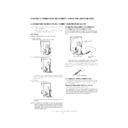
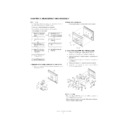
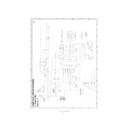
6) Version display (for service)
Power ON
Display the software version.
With the version displayed, no button operations are valid.
7) Aging (for service)
Power
ON
Blue
H
Green
H
Red
H
Dark blue
H
Dark green
H
Dark red
H
White
H
Black
8) Aging-2 (for service)
Power ON
Red
H
Green
H
Blue
H
White
H
Black
H
Flicker pattern
H
Checker pattern
H
Gray scale
When the test is terminate, Power off
4) Adjusting the Volume and Bright
Buttons
1) Resetting all adjustment values
Power ON
Power ON
Press the above two buttons at same time, and while turn the power on.
2) ADJUSTMENT menu reset
Press the two buttons at same time.
3) Adjustment lock function
While pressing the MENU button, turn the power on.
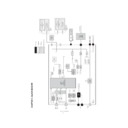
5) Screen adjustment
MENU
ADJUSTMENT
AUTO
SELECT
CLOCK
SELECT
PHASE
SELECT
H-POS
SELECT
V-POS
SELECT
HUE
SELECT
SELECT
SELECT
SELECT
SATURATION
INFORMATION
MENU
GAIN
CONTROL
(For ANALOG)
CONTROL
(For ANALOG)
AUTO
SELECT
BLACK LEVEL
SELECT
CONTRAST
MENU
COLOR
CONTROL
CONTROL
COLOR MODE (sRGB, STD, VIVID)
COOL STD
WHITE BALANCE
WHITE BALANCE
WARM USER
SELECT
R-CONTRAST
SELECT
SELECT
G-CONTRAST
B-CONTRAST
MENU
MODE SELECT
OSD
400 LINES
SCALING
LANGUAGE
(English, German, French, Dutch, Spanish, Italian, Swedish)
MENU
MENU
MENU
MENU
MENU
MENU
SELECT
(for ANALOG)
buttons
buttons
buttons
buttons
buttons
buttons
buttons
button
button
button
buttons
buttons
buttons
buttons
buttons
buttons
END
SELECT
VOLUME
BRIGHT
buttons
buttons
SELECT
OSD V-POSITION
OSD PIVOT
SELECT
SELECT
SELECT
buttons
buttons
SELECT
OSD H-POSITION
buttons
buttons
buttons
+
MENU
MENU
+
DIAG TOOL MENU
AGING TEST 1
AGING TEST 2
SET [MENU]
< VERSION & CHECK SUM >
VERSION : 1.04 (20020411)
CHECK SUM : OK A02D
HS
MENU
SELECT
SELECT
MENU
PC-UM10M
LL-H1513-E CONNECTION, ADJUSTMENT, OPERATION, AND FUNCTIONS
2 – 6
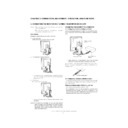
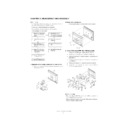
3-2. ADJUSTMENT ITEM LIST
BUTTON
ITEM
ADJUSTMENT
DESCRIPTION
MENU
MENU 1:
ADJUSTMENT
ADJUSTMENT
MANUAL
CLOCK
0~256
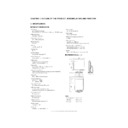
CLOCK: The figure below demonstrates how to adjust so that
vertical flicker noise is not emitted. (
e d
buttons)
MENU 1
4
MENU 2
4
MENU 3
4
MENU 4
4
MENU END
PHASE
0~31
PHASE:
The figure below demonstrates how to adjust so that
horizontal flicker noise is not emitted. (
horizontal flicker noise is not emitted. (
e d
e d
e d
e d
buttons)
H-POS
0~400
H-POS (horizontal positioning) and
V-POS (vertical positioning)
V-POS (vertical positioning)
To center the screen image within the boundaries of the
screen, adjust the left-right (H-POS) values and the up-down
(V-POS) values. (
screen, adjust the left-right (H-POS) values and the up-down
(V-POS) values. (
e d
e d
e d
e d
buttons)
V-POS
0~100
AUTO
Automatic screen adjustment
Options in the ADJUSTMENT Menu can be adjusted auto-
matically. (CLOCK, PHASE, H-POS V-POS).
matically. (CLOCK, PHASE, H-POS V-POS).
MENU 2:
GAIN
CONTROL
GAIN
CONTROL
MANUAL
BLACK LEVEL
0~100
BLACK LEVEL: Total screen brightness can be adjusted while
watching the color pattern. (
e d
buttons)
CONTRAST
0~31
CONTRAST:
While watching the color pattern, adjustments
can be made so that all graduations appear.
(
can be made so that all graduations appear.
(
e d
e d
e d
e d
buttons)
AUTO
GAIN CONTROL Menu
AUTO:
AUTO:
Every menu option is automatically adjusted using the
Auto Gain Control function.
Auto Gain Control function.
MENU 3:
COLOR
CONTROL
COLOR
CONTROL
COLOR MODE
sRGB, STD, VIVID
STD:
Displays image with the color tone results from original
scheme of liquid crystal panel.
scheme of liquid crystal panel.
sRGB: sRGB is international standard of color representation
specified by IEC (International Electrotechnical Commis-
sion). Color conversion is made in taking account of liq-
uid crystals characteristics and represents color tone
close to it original image.
sion). Color conversion is made in taking account of liq-
uid crystals characteristics and represents color tone
close to it original image.
VIVID: Displays an image with dynamic and VIVID primary col-
ors.
WHITE BALANCE
COOL • STD • WARM
(5 levels),
USER R • G • B: 0~255
(5 levels),
USER R • G • B: 0~255
WHITE BALANCE Menu
COOL
: Color tone bluer than standard
•
: Color tone slightly bluer than standard
STD
: Color tone standard setting
•
: Color tone slightly redder than standard
WARM
: Color tone redder than standard
USER
R-CONTRAST
:
e
button for blue-green
d
button for red
G-CONTRAST :
e
button for purple
d
button for green
B-CONTRAST
:
e
button for yellow
d
button for blue
HUE
-50~50
Hue can be adjusted. (
e d
buttons)
SATURATION
-50~50
Color saturation can be adjusted. (
e d
buttons)
At the minimum value, the screen is black and white.
MENU 4:
MODE
SELECT
MODE
SELECT
INFORMATION
A model name, a serial number, and usage time can be
checked. After selecting [INFORMATION], press the
checked. After selecting [INFORMATION], press the
d
but-
ton. (When adjustment complete: MENU button)
OSD H-POSITION
OSD H-POSITION (OSD horizontal position)
The position of the OSD display can be moved to the left and
right. (
right. (
e d
buttons)
OSD V-POSITION
OSD V-POSITION (OSD vertical position)
The position of the OSD display can be moved up and down.
(
(
e d
buttons)
OSD PIVOT
The orientation of the OSD display can bechanged.(
e d
buttons)
ON
Orientation for long height display
OFF
Orientation for long width display
LANGUAGE
7 countrys
DEUTSCH, ENGLISH,
ESPANOL, FRANCAIS,
ITA LIA NO, NETHER-
LAND, SVENSKA
DEUTSCH, ENGLISH,
ESPANOL, FRANCAIS,
ITA LIA NO, NETHER-
LAND, SVENSKA
LANGUAGE
Messages displayed on the screen and OSD Menu contents can
be changed to the following languages.
Messages displayed on the screen and OSD Menu contents can
be changed to the following languages.
Dutch, English, French, German, Spanish, Italian, Swedish.
SCALING
1~5
SCALING (Level of scaling)
The sharpness of the image can be adjusted. (
e d
buttons)
400 LINES
640 • 720
400 LINES (degree of resolution)
You can specify the horizontal resolution of a 400-line screen
when using US text, etc.(
when using US text, etc.(
e d
buttons)
640: 640
u
400 dot mode
720: 720
u
400 dot mode (US text etc.)
SELECT
Select the item
< >
0~31
Adjusting the backlight
< >
0~22
Adjusting the volume
POWER OFF
Display

