Sharp R-874 (serv.man2) Service Manual ▷ View online
R-874M - 8
simultaneously.
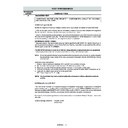
MICROWAVE AND BOTTOM GRILL (Figure O-5c)
Programme the desired cooking time by touching the
TIME keys. Touch the DUAL CONVECTION/GRILL three
times. Select the microwave power level by touching the
MICROWAVE POWER LEVEL key. When the STARTkey
is touched, the following operations occur:
1. The numbers on the digital readout start the count
TIME keys. Touch the DUAL CONVECTION/GRILL three
times. Select the microwave power level by touching the
MICROWAVE POWER LEVEL key. When the STARTkey
is touched, the following operations occur:
1. The numbers on the digital readout start the count
down to zero.
2. The oven lamp, cooling fan motor and turntable motor
are energized.
3. The relay RY4 is energized and the main supply
voltage is applied to the bottom grill heating element.
4. The relay RY2 is energized and the microwave energy
is generated by magnetron.
5. Now, the food is cooked by microwave and bottom grill
simultaneously.
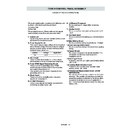
POWER SETTING
Following table shows each power setting of the top
heating element, bottom heating element, magnetron, fan
motor and convection motor on Convection cooking mode,
Dual (Micro + Convec.) mode and Convection preheating
mode.
heating element, bottom heating element, magnetron, fan
motor and convection motor on Convection cooking mode,
Dual (Micro + Convec.) mode and Convection preheating
mode.
POWER OUTPUT
ON TIME
OFF TIME
100%
48 sec.
0 sec.
90%
44 sec.
4 sec.
80%
40 sec.
8 sec.
70%
36 sec.
12 sec.
60%
32 sec.
16 sec.
50%
26 sec.
22 sec.
40%
22 sec.
26 sec.
30%
16 sec.
32 sec.
20%
12 sec.
36 sec.
10%
8 sec.
40 sec.
AUTOMATIC COOKING
PIZZA
BREAKFAST
INSTANT COOK
AUTO COOK
AUTO DEFROST
Above functions are automatic cooking. They automati-
cally work out the correct cooking mode and cooking time
and/or cooking temperature. They will cook according to
the special cooking sequence.
BREAKFAST
INSTANT COOK
AUTO COOK
AUTO DEFROST
Above functions are automatic cooking. They automati-
cally work out the correct cooking mode and cooking time
and/or cooking temperature. They will cook according to
the special cooking sequence.
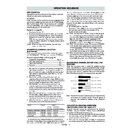
LIMITATIONS OF POWER OUTPUT IN MANUAL
OPERATION
OPERATION
After the same cooking mode is carried out for more than
the specified cooking time, the power output is automati-
cally reduced by turning the control relays on and off
intermittently, as shown in the table below. This is to
protect the oven door against temperature rising.
the specified cooking time, the power output is automati-
cally reduced by turning the control relays on and off
intermittently, as shown in the table below. This is to
protect the oven door against temperature rising.
OPERATION SEQUENCE
CONV. COOKING
DUAL/CONVEC. COOKING
CONVE
TOP
BOTTOM
TOP
BOTTOM
MAGNETRON
FAN
CTION
HEATER
HEATER
HEATER
HEATER
(MICRO)
MOTOR
MOTOR
250˚C
70%
70%
70%
70%
10, 30, 50%
100%
100%
230˚C
60%
70%
50%
70%
10, 30, 50%
100%
100%
220˚C
40%
70%
40%
70%
10, 30, 50%
100%
100%
200˚C
40%
60%
40%
60%
10, 30, 50%
100%
100%
180˚C
40%
50%
40%
50%
10, 30, 50%
100%
100%
160˚C
20%
40%
20%
40%
10, 30, 50%
100%
100%
130˚C
20%
30%
20%
30%
10, 30, 50%
100%
100%
100˚C
20%
20%
20%
20%
10, 30, 50%
100%
100%
70˚C
10%
20%
10%
20%
10, 30, 50%
100%
100%
40˚C
10%
10%
10%
10%
10, 30, 50%
100%
0%
CONVECTION PREHEATING
TOP HEATER
BOTTOM HEATER
FAN MOTOR
CONV. MOTOR
250˚C
100%
100%
60%
0%
230˚C
100%
100%
60%
0%
220˚C
100%
100%
60%
0%
200˚C
100%
100%
60%
0%
180˚C
100%
100%
60%
0%
160˚C
100%
100%
60%
0%
130˚C
100%
100%
60%
0%
100˚C
100%
100%
60%
0%
70˚C
100%
100%
60%
0%
40˚C
100%
100%
60%
0%
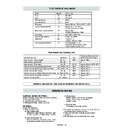
ON/OFF TIME RATIO
In grill cooking, convection cooking or dual cooking, the
top heater, bottom heater or magnetron operate whithin a
48 second time base. The following table is the ON / OFF
time ratio at each power output of the top heaters, bottom
heater or magnetron.
top heater, bottom heater or magnetron operate whithin a
48 second time base. The following table is the ON / OFF
time ratio at each power output of the top heaters, bottom
heater or magnetron.
D
U
A
L
Specified cooking
Limited power
Time base
Cooking mode
time (minutes)
output (%)
(seconds)
Microwave (100%)
20
70
32
Top grill
30
50
48
Bottom grill
45
50
48
Top grill and
15 (Top)
50
48
Bottom grill
15(Bottom)
50
48
Micro. (100%)
20 (Micro.)
70
48
+ Top grill
15 (Grill)
50
48
Micro. (100%)
20 (Micro.)
70
48
+ Bottom grill
15 (Heater)
50
48
NOTE:
1. In case of Automatic operations, the limitations of
1. In case of Automatic operations, the limitations of
power output are not carried out.
2. In case that the stop key is touched or the oven door
is opened during cooking, the limitations of power
output are not carried out after the total cooking time
beyond the specified cooking time.
output are not carried out after the total cooking time
beyond the specified cooking time.
3. In case of the two or more same cooking modes are
carried out, the limitations of power output are not
carried out after the total cooking time beyond the
specified cooking time.
carried out after the total cooking time beyond the
specified cooking time.
4. In case of the two or more different cooking modes are
carried out, the specified cooking time is started to
count from the point when the cooking mode is changed.
count from the point when the cooking mode is changed.
5. If the cooking mode has the power level display, the
power level is also displayed when the limitations of
R-874 S/MANUAL
11/7/01, 10:59 am
8
R-874M - 9
DOOR OPEN MECHANISM
The door can be opened by pushing the open button on the
control panel. When the open button is pushed, the open
lever pushes the lower latch head on the door upward.
The upper latch head is linked with the lower latch head,
so now, the door can be opened.
control panel. When the open button is pushed, the open
lever pushes the lower latch head on the door upward.
The upper latch head is linked with the lower latch head,
so now, the door can be opened.
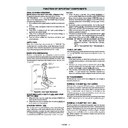
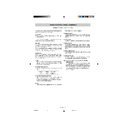
Figure D-1. Door Open Mechanism
MONITORED LATCH SWITCH
1. When the oven door is closed, the contacts (COM-NO)
of the switch must be closed. And the contacts (COM-
NC) must be opened.
NC) must be opened.
2. When the oven door is opened, the contacts (COM-
NO) of the switch must be opened. And the contacts
(COM-NC) must be closed.
(COM-NC) must be closed.
STOP SWITCH
1. When the oven door is closed, the contacts (COM-NO)
of the switch must be closed.
2. When the oven door is opened, the contacts (COM-
NO) of switch must be opened.
MONITOR SWITCH
The monitor switch is activated (the contacts opened) by the
upper latch head on the door while the door is closed. The
switch is intended to render the oven inoperative by means of
blowing the fuse F8A when the contacts of the monitored
latch switch fail to open when the door is opened.
Function
1. When the door is opened, the contacts (COM-NC) of
upper latch head on the door while the door is closed. The
switch is intended to render the oven inoperative by means of
blowing the fuse F8A when the contacts of the monitored
latch switch fail to open when the door is opened.
Function
1. When the door is opened, the contacts (COM-NC) of
monitor switch close (to the ON condition) due to their
being normally closed and contacts (COM-NO) open.
At this time the contacts (COM-NO) of monitored latch
switch is in the OFF condition (contacts open) due to
their being normally open contact switches.
being normally closed and contacts (COM-NO) open.
At this time the contacts (COM-NO) of monitored latch
switch is in the OFF condition (contacts open) due to
their being normally open contact switches.
2. As the door goes to a closed position, the monitor
switch contacts (COM-NC) are opened and contacts
(COM-NO) closed and then contacts (COM-NO) of
monitored latch switch and stop switch are closed.(On
opening the door, each of these switches operate
inversely.)
(COM-NO) closed and then contacts (COM-NO) of
monitored latch switch and stop switch are closed.(On
opening the door, each of these switches operate
inversely.)
3. If the door is opened and the monitored latch switch
contacts (COM-NO) fail to open, the fuse F8A blows
immediately after closing of the monitor switch (COM-
NC) contacts.
immediately after closing of the monitor switch (COM-
NC) contacts.
CAUTION: BEFORE REPLACING A BLOWN FUSE F8A,
TEST THE MONITORED LATCH SWITCH
AND MONITOR SWITCH FOR PROPER
OPERATION. (REFER TO CHAPTER “TEST
PROCEDURE”).
AND MONITOR SWITCH FOR PROPER
OPERATION. (REFER TO CHAPTER “TEST
PROCEDURE”).
FUSE F1 20A 250V
If the wire harness or electrical components are short-
circuited, this fuse blows to prevent an electric shock or fire
hazard.
hazard.
FUSE F2 F8A 250V
1. If the wire harness or electrical components are short-
circuited, this fuse blows to prevent an electric shock or
fire hazard.
fire hazard.
2. The fuse also blows when the monitored latch switch
remains closed with the oven door open and when the
monitor switch contact (COM-NC) closes.
monitor switch contact (COM-NC) closes.
3. The fuse also blows when the asymmetric rectifier,
H.V. rectifier,.H.V. wire harness, H.V. capacitor,
magnetron or secondary winding of high voltage trans-
former is shorted.
magnetron or secondary winding of high voltage trans-
former is shorted.
TC TRANSFORMER
T/C transformer converts A.C. line voltage into low voltage
to drive the control unit.
to drive the control unit.
THERMAL CUT-OUT 125˚C (MG)
This thermal cut-out protects the magnetron against over-
heat. If the temperature goes up higher than 125˚C be-
cause the fan motor is interrupted or the ventilation open-
ings are blocked, the thermal cut-out will open and line
voltage to the high voltage transformer will cut off and
operation of the magnetron will be stopped. The defec-
tive thermal cut-out must be replaced with a new one.
THERMAL CUT-OUT 150˚C (OVEN)
This thermal cut-out protects the oven against the over-
heat during grill cooking, convection cooking or dual
(combination) cooking. If the temperature rises above
150˚C because the fan motor is interrupted, the air inlet
duct is blocked or the ventilation openings are obstructed,
the thermal cut-out opens and switches off all the electrical
parts. When the cools itself down to the operating tem-
perature of 130˚C, the contacts of the thermal cut-out will
close again.
ASYMMETRIC RECTIFIER
The asymmetric rectifier is a solid state device that pre-
vents current flow in both directions. It prevents the
overheating of the high voltage transformer by blowing the
fuseF8A when the high voltage rectifier is shorted.
vents current flow in both directions. It prevents the
overheating of the high voltage transformer by blowing the
fuseF8A when the high voltage rectifier is shorted.
The rated peak reverse voltage of D1 of the asymmetric
rectifier is 6 KV. The rated peak reverse voltage of D2 of
the asymmetric rectifier is 1.7 KV. D1 and D2 of the
asymmetric rectifier or high voltage rectifier are shorted
when the each peak reverse voltage goes beyond the
each rated peak reverse voltage. (The process of the
blowing the fuse F8A.)
rectifier is 6 KV. The rated peak reverse voltage of D2 of
the asymmetric rectifier is 1.7 KV. D1 and D2 of the
asymmetric rectifier or high voltage rectifier are shorted
when the each peak reverse voltage goes beyond the
each rated peak reverse voltage. (The process of the
blowing the fuse F8A.)
FUNCTION OF IMPORTANT COMPONENTS
D2
D1
ASYMMETRIC
RECTIFIER
RECTIFIER
HIGH VOLTAGE
RECTIFIER
RECTIFIER
1. The high voltage rectifier is shorted by some fault when
microwave cooking or dual cooking.
2. The peak reverse voltage of D2 of the rectifier goes
beyond the rated peak reverse voltage 1.7 KV in the
voltage doubler circuit.
voltage doubler circuit.
3. D2 of the rectifier is shorted.
4. The large electric currents flow through the high volt-
4. The large electric currents flow through the high volt-
age winding of the high voltage transformer.
5. The large electric currents beyond 8A flow through the
DOOR
LATCH HOOK
MONITOR SWITCH
MONITORED
LATCH SWITCH
LATCH SWITCH
STOP SWITCH
OPEN LEVER
LATCH
HEADS
HEADS
R-874 S/MANUAL
11/7/01, 10:59 am
9
R-874M - 10
primary winding of the high voltage transformer.
6. The fuse F8A blows by the large electric currents.
7. The power supplying to the high voltage transformer is
7. The power supplying to the high voltage transformer is
cut off.
NOISE FILTER
The noise filter assembly prevents radio frequency inter-
ference that might flow back in the power circuit.
ference that might flow back in the power circuit.
TURNTABLE MOTOR
The turntable motor rotates the turntable.
FAN MOTOR
The fan motor drives a blade which draws external cool air.
This cool air is directed through the air vanes surrounding
the magnetron and cools the magnetron. This air is chan-
nelled through the oven cavity to remove steam and
vapours given off from heating food. It is then exhausted
through the exhausting air vents of the oven cavity.
This cool air is directed through the air vanes surrounding
the magnetron and cools the magnetron. This air is chan-
nelled through the oven cavity to remove steam and
vapours given off from heating food. It is then exhausted
through the exhausting air vents of the oven cavity.
CONVECTION MOTOR
The convection motor drives the convection fan and
provide the heated air.
provide the heated air.
TOP GRILL HEATING ELEMENT
The grill heating element is provided to brown the food and
is located on the top of the oven cavity.
is located on the top of the oven cavity.
BOTTOM GRILL HEATING ELEMENT
The grill heating element is provided to brown the food and
is located at the base of the oven cavity.
is located at the base of the oven cavity.
CONVECTION COOKING SYSTEM
Figure D-2. Convection Cooking System
FIRE SENSING FEATURE
The oven will stop its operation when there is a fire in the
oven cavity in microwave cooking condition.
LSI measures the voltage across the temperature meas-
urement circuit intermittently within 32-seconds time base
since the oven is started in microwave cooking condition.
The oven will stop its operation when the difference of the
voltage is more than 0.781 volts in microwave cooking
condition.
1. Within a 32-seconds base, the thermistor is energized
for 2 seconds. At that time, the voltage across the
temperature measurement circuit is measured.
temperature measurement circuit is measured.
2. The oven carries out the procedure above again. If the
second voltage is 0.781V higher than first voltage, LSI
judges it is a fire in the oven cavity and stop the oven.
judges it is a fire in the oven cavity and stop the oven.
3. When LSI judges it is a fire in the oven cavity, LSI will
switch off the relays to high voltage transformer and fan
motor and LSI stops counting down.
motor and LSI stops counting down.
OPEN JUDGE BY THERMISTOR
1. If the temperature of the thermistor does not rise to
more than 40˚C after 4 minutes and 15 seconds from
when the oven is started in convection, grill (top and
bottom grills) or dual cooking mode, the oven is turned
off.
when the oven is started in convection, grill (top and
bottom grills) or dual cooking mode, the oven is turned
off.
2. When the thermistor or the wire harness to the thermis-
tor is opened, the oven is turned off after 4 minutes and
15 seconds because this condition is same as above.
15 seconds because this condition is same as above.
THERMISTOR
Sensing
Voltage
ON
OFF
ON
OFF
30
32 (sec.)
Sensing the voltage across temperature measurement circuit.
Door
Oven Cavity
Grill Heating
Element
Element
Bottom Grill
Heating Element
Heating Element
Convection
Passage
Passage
Cooling
Fan
Fan
Convection
Motor
Motor
Convection
Fan
Fan
Turntable
Insulation
Turntable
Motor
Motor
FUNCTION OF IMPORTANT COMPONENTS
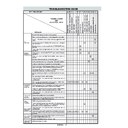
TROUBLESHOOTING GUIDE
When troubleshooting the microwave oven, it is helpful to follow the Sequence of Operation in performing the checks.
Many of the possible causes of trouble will require that a specific test be performed. These tests are given a procedure
letter which will be found in the “Test Procedure” section.
Many of the possible causes of trouble will require that a specific test be performed. These tests are given a procedure
letter which will be found in the “Test Procedure” section.
IMPORTANT: If the oven becomes inoperative because of a blown fuse F8A in the monitored latch switch - monitor
switch circuit, check the monitored latch switch and monitor switch before replacing the fuse F8A.
R-874 S/MANUAL
11/7/01, 10:59 am
10

