Sharp R-874 (serv.man11) User Manual / Operation Manual ▷ View online
13
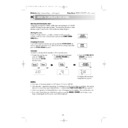
CONVECTION COOKING
Website: http://www.sharp.co.uk/support
Help Line: 08705 274277 (office hours)
The oven cavity, door, outer cabinet, turntable, racks, dishes and especially bottom grill heater will become very
hot. To prevent burns, always use thick oven gloves when removing the food or turntable from the oven.
hot. To prevent burns, always use thick oven gloves when removing the food or turntable from the oven.
WARNING:
EXAMPLE:
To bake for 25 minutes at 200°C convection.
To bake for 25 minutes at 200°C convection.
NOTES:
• Once the oven has started you can find out the temperature you have programmed by pressing the
• Once the oven has started you can find out the temperature you have programmed by pressing the
CONV. (°C) key. The temperature will appear on the display. This will not affect the programme or
cooking time.
cooking time.
• After cooking is complete the cooling fan will continue working for a short time to lower the temperature
of the electrical and mechanical components. The display may show “NOW COOLING”.
• Recipes requiring a browned or crispy underside (ie; pies, pizza and bread), should be placed directly
on the turntable, unless instructions in the cookbook section state otherwise.
• Joints of meat/poultry should be cooked on the low rack, on the turntable.
• Small food items such as pastries or biscuits should be cooked on the low rack so as to avoid browning
• Small food items such as pastries or biscuits should be cooked on the low rack so as to avoid browning
too quickly.
The temperatures available in degrees Centigrade are:
250°C, 230°C, 220°C, 200°C, 180°C,
160°C, 130°C, 100°C, 70°C, 40°C
250°C, 230°C, 220°C, 200°C, 180°C,
160°C, 130°C, 100°C, 70°C, 40°C
Your oven can be programmed to cook
with ten different temperatures by
combining the top and bottom grills with
the convection fan.
with ten different temperatures by
combining the top and bottom grills with
the convection fan.
NOTES:
• CONVECTION cooking is ideal for cooking buns, biscuits and scones.
• When using the CONVECTION facility, all metal cookware can be used. See SUITABLE COOKWARE
• CONVECTION cooking is ideal for cooking buns, biscuits and scones.
• When using the CONVECTION facility, all metal cookware can be used. See SUITABLE COOKWARE
pages 27 - 28.
• Temperature measurements taken whilst the oven is in convection mode will differ slightly from the
displayed level. This is due to the grill elements turning on and off in order to regulate the oven
temperature. This will not affect the cooking results as long as the operation manual and cook book are
followed correctly.
temperature. This will not affect the cooking results as long as the operation manual and cook book are
followed correctly.
1. To enter the baking time,
press the 10 MIN key
twice then the 1 MIN
key 5 times.
twice then the 1 MIN
key 5 times.
2. To enter the temperature
press the CONV. (°C) key
4 times.
4 times.
3. Press the START/AUTO
MINUTE key once to
start cooking.
start cooking.
The display will count down
through the baking time.
through the baking time.
x1
x4
x2
x5
R-874M/R-84STM Op Man/Ck Bk 28/3/01 8:41 am Page 13
There are three DUAL COOKING modes:
1. DUAL-1- Convection and Microwave
2. DUAL-2 - Top Grill and Microwave
3. DUAL-3 - Bottom Grill and Microwave
1. DUAL-1- Convection and Microwave
2. DUAL-2 - Top Grill and Microwave
3. DUAL-3 - Bottom Grill and Microwave
• First enter cooking time.
• Then select the DUAL COOKING mode by
• Then select the DUAL COOKING mode by
pressing the DUAL CONV./GRILL key until
the desired setting appears on the display. See
table opposite.
the desired setting appears on the display. See
table opposite.
• Press the START/AUTO MINUTE key.
The combination of microwaves with the grill or
the convection reduces cooking time and
provides a crisp, brown finish, giving you the
convenience of fast cooking with a traditional
appetising appearance.
the convection reduces cooking time and
provides a crisp, brown finish, giving you the
convenience of fast cooking with a traditional
appetising appearance.
DUAL COOKING combines
the power of microwave with
convection or the grill modes.
the power of microwave with
convection or the grill modes.
14
DUAL COOKING
Website: http://www.sharp.co.uk/support
Help Line: 08705 274277 (office hours)
1. To enter the grilling time, press
the 10 MIN key once then the
1 MIN key 5 times.
1 MIN key 5 times.
2. Press the DUAL CONV./
GRILL
key twice.
4. Press the START/AUTO
MINUTE key once to
start cooking.
start cooking.
The display will count down
through the cooking time.
through the cooking time.
Example 1:
To cook for 15 minutes using DUAL - 2, combining 70% microwave power with the top grill.
To cook for 15 minutes using DUAL - 2, combining 70% microwave power with the top grill.
x1
x2
x1
x5
3. To change the power level press
the MICRO. POWER key 3
times for 70%.
times for 70%.
x3
COOKING MODE
Dual Grill - 1 (Convection + Microwave*)
Dual Grill - 2 (Top Grill + Microwave*)
Dual Grill - 3 (Bottom Grill + Microwave*)
PRESS DUAL
CONV./GRILL
KEY
Once
Twice
3 times
NOTE:
* To adjust the microwave power level, press the
* To adjust the microwave power level, press the
MICRO. POWER key.
* You can select power levels 10% to 100% for
DUAL - 2/DUAL - 3, and power levels 10% to 50%
for DUAL - 1.
for DUAL - 1.
R-874M/R-84STM Op Man/Ck Bk 28/3/01 8:41 am Page 14
NOTES:
• Follow recommended DUAL COOKING times and procedures given in the chart on pages 39 - 41.
• After cooking, the display will show “NOW COOLING”.
• Follow recommended DUAL COOKING times and procedures given in the chart on pages 39 - 41.
• After cooking, the display will show “NOW COOLING”.
The oven cavity, door, outer cabinet, turntable, racks, dishes and especially bottom grill heater will become very
hot. To prevent burns, always use thick oven gloves when removing the food or turntable from the oven.
hot. To prevent burns, always use thick oven gloves when removing the food or turntable from the oven.
WARNING:
15
DUAL COOKING
Website: http://www.sharp.co.uk/support
Help Line: 08705 274277 (office hours)
1. To enter the cooking time,
press the 10 MIN key
twice.
twice.
2. Press the DUAL
CONV./GRILL
key
once.
5. Press the START/AUTO
MINUTE key once to
start cooking.
start cooking.
Example 2:
To cook for 20 minutes using DUAL-1, 230°C, combined with 10% microwave power.
To cook for 20 minutes using DUAL-1, 230°C, combined with 10% microwave power.
x1
x1
x2
3. To change the temperature
press the CONV. (°C) key
once.
once.
x1
COOKING HINT: For DUAL - 1 and DUAL - 2
Use the low rack for browning food in larger dishes such as Lasagne.
Use the low rack for browning food in larger dishes such as Lasagne.
4. To change the power level
press the MICRO. POWER
key once for 10%.
key once for 10%.
x1
The display will count down
through the cooking time.
through the cooking time.
R-874M/R-84STM Op Man/Ck Bk 28/3/01 8:41 am Page 15
INSTANT COOK enables you to cook the foods listed on the
control panel and on the chart on page 17.
control panel and on the chart on page 17.
Follow the example below for details on how to operate this
function.
function.
1. Press the BAKED
POTATOES key
four times.
four times.
2. The oven will automatically
start cooking after 2 seconds.
x4
The oven cavity, door, outer cabinet, turntable, racks, dishes and especially bottom grill heater will become very
hot. To prevent burns, always use thick oven gloves when removing the food or turntable from the oven.
hot. To prevent burns, always use thick oven gloves when removing the food or turntable from the oven.
WARNING:
EXAMPLE: To cook 4 baked potatoes.
16
INSTANT COOK
Website: http://www.sharp.co.uk/support
Help Line: 08705 274277 (office hours)
WEIGHT RANGE:
• Food weight should be rounded up to the nearest 0.1kg, for example, 0.65kg to 0.7kg.
• You are restricted to enter a weight within the range given (see the chart on page 17).
• To cook weights below or above that range or foods not included in the chart on page17, refer to the
• Food weight should be rounded up to the nearest 0.1kg, for example, 0.65kg to 0.7kg.
• You are restricted to enter a weight within the range given (see the chart on page 17).
• To cook weights below or above that range or foods not included in the chart on page17, refer to the
charts in the cookbook section.
NOTES:
• The INSTANT COOK function can only be input within 3 minutes after cooking completion, closing the
• The INSTANT COOK function can only be input within 3 minutes after cooking completion, closing the
door or pressing the STOP/CLEAR key.
• You can enter the weight by holding down the desired INSTANT COOK key, as well as by pressing, until
the desired weight appears.
• You can use the LESS/MORE keys, see page 23. Press the MORE or LESS keys before pressing the
START/AUTO MINUTE key where recommended in the chart on page 17.
• When action is required (example, to turn food over), the oven stops and indicates instructions on the
display. To continue cooking, press the START/AUTO MINUTE key.
• The final temperature will vary according to the initial food temperature. Check food is piping hot after
cooking. If necessary, you can extend the cooking manually.
• You can enter the weight in Lb/oz or Kg/g. To convert to either weight range press the WEIGHT
CONVERSION key once before pressing desired INSTANT COOK key. See page 26.
• All menus on INSTANT COOK use a combination of microwave power and grill/convection during the
cooking programme to provide a brown, crisp traditional looking and tasting result.
• If you use the AUTO MINUTE function during INSTANT COOK operation, the food may be overcooked.
R-874M/R-84STM Op Man/Ck Bk 28/3/01 8:41 am Page 16

