Sharp R-874 (serv.man10) User Manual / Operation Manual ▷ View online
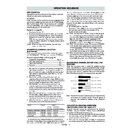
Your oven has an Energy Save Mode. This facility saves electricity when the oven is not in use.
When you have unpacked your oven and assembled the turntable correctly (please refer to pages 2 & 5)
plug the oven into your electricity supply. Open & close the door. “0” will appear on the display. The oven is
now ready for use.
The oven will default to Energy Save Mode after 3 minutes if not used. In Energy Save Mode the display is
blank and the oven cannot be operated.
To cancel Energy Save Mode:
i) Open & close the door. “0” will be displayed and the oven is ready for use.
ii) Set the clock. Please refer to “Setting the clock” on page 9. (To revert back to Energy Save Mode, follow
the procedure below).
Note: If you unplug your oven at any stage you will have to reset the clock to cancel Energy Save Mode.
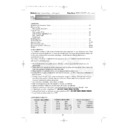
To start Energy Save Mode when the clock is set.
1. Make sure the
correct time
appears on the
display.
appears on the
display.
2. Press the KITCHEN
TIMER/CLOCK SET
key 3 times.
key 3 times.
3. Press the START/AUTO
MINUTE key. The power
will be off and the display
will show nothing.
will be off and the display
will show nothing.
x3
x1
Your oven has an energy save mode.
1. Plug in the oven. Nothing will appear on the
1. Plug in the oven. Nothing will appear on the
display at this time.
2. Open the door. The display will flash the message
shown.
3. Close the door. The display will show “ . 0”.
If you set the clock, “energy save” mode will be
off. If you keep “energy save” mode, go to step 5.
off. If you keep “energy save” mode, go to step 5.
4. Set the clock, refer to page 9.
5. Heat the oven using the upper and lower grills
5. Heat the oven using the upper and lower grills
without food for 20 minutes. (For operation, see
NOTES on page 11).
NOTES on page 11).
8
BEFORE OPERATION
Website: http://www.sharp.co.uk/support
Help Line: 08705 274277 (office hours)
ENERGY SAVE MODE
1.
2.
3.
R-874M/R-84STM Op Man/Ck Bk 28/3/01 8:41 am Page 8
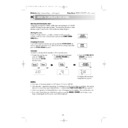
SETTING THE CLOCK
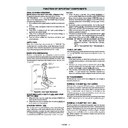
Your oven is fitted with a 12 hour clock.
To set the time of day, follow the guidelines given in the example below:
To set the time of day, follow the guidelines given in the example below:
EXAMPLE:
To set the time of day, 12:35:
To set the time of day, 12:35:
1. Press the KITCHEN TIMER/
CLOCK SET key twice.
2. To enter the hours, by pressing
the 10 MIN key once and the
1 MIN key twice.
1 MIN key twice.
3. To change from hours to minutes
press the KITCHEN TIMER/
CLOCK SET key once.
CLOCK SET key once.
x2
x1
x2
9
Website: http://www.sharp.co.uk/support
Help Line: 08705 274277 (office hours)
x1
4. To enter the minutes press the
10 MIN key 3 times then the
1 MIN key 5 times.
1 MIN key 5 times.
5. To start the clock press
the KITCHEN TIMER/
CLOCK SET key once.
CLOCK SET key once.
x1
x3
x5
NOTES:
• To check the time of day during a cooking process, press KITCHEN TIMER/CLOCK SET key and the
• To check the time of day during a cooking process, press KITCHEN TIMER/CLOCK SET key and the
time of day will remain on the display as long as you keep your finger on the key. This does not affect
the cooking process.
the cooking process.
• If the clock is set, when cooking is complete, the display will show the correct time of day. If the clock
has not been set, the display will only show
when cooking is complete.
• If the electrical power supply to your microwave oven is interrupted, the display will intermittently show:
after the power is reinstated. If this occurs during cooking, the programme will be erased. The
time of day will also be erased.
• When you want to reset the time of day, follow the above example again.
R-874M/R-84STM Op Man/Ck Bk 28/3/01 8:41 am Page 9
Display

