Sharp R-86STM (serv.man11) Service Manual ▷ View online
R86STM
11 – 4
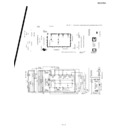
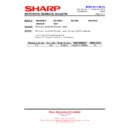
[9] POSITIVE LOCK CONNECTOR REMOVAL
1. CARRY OUT 3D CHECKS.
2. Push the lever of positive lock
®
connector.
3. Pull down on the positive lock
®
connector.
Figure C-1. Positive lock
® connector
CAUTION: WHEN CONNECTING THE POSITIVE LOCK
®
CON-
NECTORS TO THE TERMINALS, CONNECT THE POS-
ITIVE LOCK
ITIVE LOCK
®
SO THAT THE LEVER FACES YOU.
[10] OVEN LAMP REMOVAL
1. CARRY OUT 3D CHECKS.
2. Remove the wire leads as Positive lock
®
connector removal
above.
3. Lift up the oven lamp from its retaining clips.
Now, the oven lamp is free.
[11] POWER SUPPLY CORD REPLACEMENT
1. REMOVAL
1. CARRY OUT 3D CHECKS.
2. Remove the one (1) screw holding the green/yellow wire to the cav-
ity back plate.
3. Disconnect the leads of the power supply cord from the noise filter,
referring to the Figure C-4(a).
4. Release the power supply cord from the rear cabinet.
5. Now, the power supply cord is free.
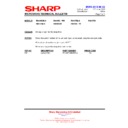
Figure C-4 (a) Power Supply Cord Replacement
2. REINSTALLATION
1. Insert the moulding cord stopper of power supply cord into the
square hole of the cavity back plate, referring to the Figure C-4(b).
2. Install the earth wire lead of power supply cord to the oven cavity
with one (1) screw and tight the screw.
3. Connect the brown and blue wire leads of power supply cord to the
noise filter correctly, referring to the Pictorial Diagram.
Figure C-4(b). Power Supply Cord Replacement
[12] TOP HEATING ELEMENTS REMOVAL
1. CARRY OUT 3D CHECKS.
2. Remove the two (2) screws holding the two (2) terminals of the
main wire harness to the top heating element.
3. Remove the two (2) screws holding the two (2) grill heater angles to
the top of the oven cavity.
4. Remove the two (2) grill heater angles from the oven cavity.
5. Remove the top heating element from the top of the oven cavity.
6. Now the top heating element is free.
Terminal
Push
Pull down
1
2
Lever
Positive lock¨
connector
Figure C-1. Positive lock, connector
Lock
Socket
Bulb
Oven lamp
Power supply cord
Green/ Yellow-
wire
wire
Brown wire
Oven cavity back plate
Blue wire
Noise filter
Screw
L
TP
F 8 A
TL
RED
20
A
WHT
N
POWER
SUPPLY CORD
SUPPLY CORD
MOULDING
CORD STOPPER
CORD STOPPER
OVEN CAVITY
BACK PLATE
BACK PLATE
SQUARE HOLE
R86STM
11 – 5
[13] BOTTOM HEATING ELEMENTS REMOVAL
1. CARRY OUT 3D CHECKS.
2. Remove the turntable motor cover from the base plate, referring to
“TURNTABLE MOTOR REPLACEMENT”.
3. Disconnect the wire leads from the bottom heating element.
4. Remove the two (2) nuts holding the heater cover and heater pack-
ing to the bottom heater.
5. Remove the heater cover and the heater packing from the bottom
heating element.
6. Remove the two(2) nuts holding the bottom heating element to the
oven cavity.
7. Remove the bottom heating element from the oven cavity.
[14] CONTROL PANEL ASSEMBLY REMOVAL
1. CARRY OUT 3D CHECKS.
2. Disconnect the wire leads and the connectors from the control unit.
3. Remove the one (1) screw holding the control panel assembly to
the oven cavity front plate.
4. Lift up the control panel assembly and pull it forward.
Now the control panel assembly is free.
At this time, the earth spring will be free. Do not lose it.
[15] GRAPHIC SHEET AND MEMBRANE SWITCH REPLACEMENT
1. REMOVAL
1. CARRY OUT 3D CHECKS.
2. Remove the control panel assembly, referring to chapter of CON-
TROL PANEL ASSEMBLY REMOVAL.
3. Disconnect the ribbon cable of the membrane switch from the con-
nector (CN-G) on the control unit.
4. Tear away the graphic sheet from the control panel frame.
5. Tear away the membrane switch from the control panel frame.
2. REINSTALL
1. Remove remaining adhesive on the control panel frame surfaces
with a soft cloth soaked in alcohol.
2. Tear the backing paper from the new membrane switch.
3. Insert the ribbon cable of the membrane switch into the slit of the
control panel frame.
4. Adjust the upper edge and right edge of the membrane switch to
the small depression on the surface of the control panel frame.
5. Attach the membrane switch to the control panel frame by rubbing
with a soft cloth not to scratch.
6. Tear the backing paper from the new graphic sheet.
7. Adjust the upper edge and right edge of the graphic sheet to the
large depression on the surface of the control panel frame.
8. Attach the graphic sheet to the control panel frame by rubbing with
a soft cloth not to scratch.
9. Connect the ribbon cable of the membrane switch to the connector
(CN-G) on the control unit.
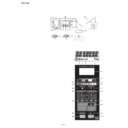
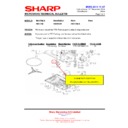
Figure C-5. Graphic Sheet and Membrane Switch Replacement
[16] MONITORED LATCH SWITCH, MONITOR SWITCH AND STOP SWITCH REMOVAL
1. CARRY OUT 3D CHECKS.
2. Remove the control panel assembly referring to “CONTROL
PANEL ASSEMBLY REMOVAL”.
3. Remove the open lever from the oven cavity front plate by remov-
ing the control panel assembly.
4. Disconnect the leads from all switches.
5. Remove the two (2) screws holding the latch hook to the oven cav-
ity.
6. Remove the latch hook.
7. Remove the switch(es) from the latch hook by pushing the retaining
tab backwards slightly and turning the switch(es) on the post.
8. Now the switch(es) is free
Figure C-5. Switches
[17] MONITORED LATCH SWITCH, STOP SWITCH AND MONITOR SWITCH ADJUSTMENT
1. Adjustment
If the monitored latch switch, stop switch and monitor switch do not
operate properly due to a mis-adjustment, the following adjustment
should be made.
should be made.
Small depression
Control panel frame
Slit
Membrane switch
Ribbon cable
Large
depression
depression
Graphic sheet
MONITOR SWITCH
STOP SWITCH
MONITORED
LATCH SWITCH
LATCH SWITCH
TAB
TAB
TAB
R86STM
11 – 6
1. CARRY OUT 3D CHECKS.
2. Loosen the two (2) screws holding the latch hook to the oven cavity
front flange.
3. 3. With the door closed, adjust the latch hook by moving it back and
forward or up and down. In and out play of the door allowed by the
latch hook should be less than 0.5mm. The horizontal position of
the latch hook should be placed where the monitor switch has acti-
vated with the door closed. The vertical position of the latch hook
should be placed where the monitored latch switch and stop switch
have activated with the door closed.
4. Secure the screws with washers firmly.
5. Make sure of the all switches operation. If the latch head has not
pushed the plungers of the monitor switch with door closed, adjust
the latch hook position. At that time, the latch head should have
pushed the plungers of the monitored latch switch and stop switch.
If the latch head has not pushed the plungers of the monitored latch
switch and stop switch with door closed, loose two (2) screws hold-
ing latch hook to oven cavity front flange and adjust the latch hook
position.
2. After adjustment, make sure of following.
1. In and out play of door remains less than 0.5mm when latched
position. First check the latch hook position, pushing and pulling
upper portion of the door toward the oven face. Then check the
lower latch hook position, pushing and pulling lower portion of the
door toward the oven face. Both results (play of the door) should be
less than 0.5mm.
upper portion of the door toward the oven face. Then check the
lower latch hook position, pushing and pulling lower portion of the
door toward the oven face. Both results (play of the door) should be
less than 0.5mm.
2. The stop switch interrupts the circuit before the door can be
opened.
3. When the door is opened, the contacts (COM-NC) of the monitor
switch and monitored latch switch close. And the contacts (COM-
NO) of their switches open.
NO) of their switches open.
4. When the door is closed the contacts (COM-NC) of the monitor
switch and monitored latch switch open. And the contacts (COM-
NO) of their switches close.
NO) of their switches close.
5. Reinstall outer case and check for microwave leakage around the
door with an approved microwave survey meter. (Refer to Micro-
wave Measurement Procedure.)
wave Measurement Procedure.)
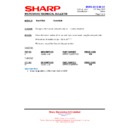
Figure C-6 Latch Switches Adjustment
[18] DOOR REPLACEMENT
1. REMOVAL
DOOR FRAME ASSEMBLY
DOOR FRAME ASSEMBLY
1. Disconnect the oven from the power supply.
2. Push the open button and open the door slightly.
3. Insert a putty knife (thickness of about 0.5mm) into the gap
between the choke cover and door frame as shown in Figure C-8 to
free engaging parts.
free engaging parts.
4. Release choke cover from door panel.
5. Now choke cover is free.
NOTE: When carrying out any repair to the door, do not bend or warp
the slit choke (tabs on the door panel assembly) to prevent
microwave leakage.
microwave leakage.
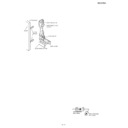
Figure C-8. Door Disassembly
6. Lift the door upwards.
7. Now, door frame assembly is free from oven cavity.
DOOR PANEL
8. Remove the six (6) screws holding the door panel to the door
frame.
9. Now, door panel is free.
LATCH HEAD AND SPRING
10.Slide latch head upward and remove it from door frame with releas-
ing latch spring from door frame and latch head.
11.Now, latch head and latch spring are free.
FRONT DOOR GLASS
12.Remove the two (2) door glass stopper from the door frame.
13.Remove the front door glass from the door frame by sliding right-
wards.
14.Now, the front door glass is free.
2. REINSTALLATION
1. Insert the front door glass to the door frame.
2. Fit the two (2) door glass stopper to the door frame to hold the front
door glass.
3. Reinstall the latch spring to the latch head. Re-install the latch
spring to the door frame. Re-install latch head to door frame.
4. Reinstall door panel to door frame.
5. Hold the door panel to the door frame with six (6) screws.
6. Located door panel hinge pins into cavity hinge location hole.
7. Reinstall choke cover to door panel by clipping into position.
NOTE: After any service to the door;
1) Make sure that the monitor switch, monitored latch
switch and stop switch are operating properly (Refer to
chapter “Test Procedures”.).
chapter “Test Procedures”.).
2) An approved microwave survey meter should be used
to assure compliance with proper microwave radiation
emission limitation standards (Refer to Microwave
Measurement Procedure.).
emission limitation standards (Refer to Microwave
Measurement Procedure.).
LATCH
HEADS
HEADS
LATCH HOOK
DOOR OPEN BUTTON
OPEN LEVER
DOOR
MONITOR SWITCH
MONITORED LATCH
SWITCH
SWITCH
STOP SWITCH
Choke Cover
Putty Knife
Door Frame
R86STM
11 – 7
3. After any service, make sure of the following:
1. Door latch heads smoothly catch latch hook through latch holes
and that latch head goes through centre of latch hole.
2. Deviation of door alignment from horizontal line of cavity face plate
is to be less than 1.0mm.
3. Door is positioned with its face pressed toward cavity face plate.
4. Check for microwave leakage around door with an approved micro-
wave survey meter (Refer to Microwave Measurement Procedure.).
NOTE: The door on a microwave oven is designed to act as an elec-
tronic seal preventing the leakage of microwave energy from
oven cavity during cook cycle. This function does not require
that door be air-tight, moisture (condensation)-tight or light-
tight. Therefore, occasional appearance of moisture, light or
sensing of gentle warm air movement around oven door is not
abnormal and do not of themselves, indicate a leakage of
microwave energy from oven cavity.
Figure C-9. Door Replacement
Pin
PIN
Lower
Oven Hinge
Oven Hinge
Upper
Oven Hinge
Oven Hinge
Lower
Oven
Hinge
Oven
Hinge
Choke Cover
Slit Choke
Door Panel
Door Frame
Assembly
Assembly
Display


