Sharp R-753 (serv.man3) Service Manual ▷ View online
2
753M -
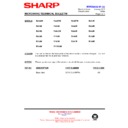
PRODUCT SPECIFICATIONS
ITEM
DESCRIPTION
Power Requirements
230-240 Volts 50 Hertz Single phase, 3 wire grounded
Power Consumption
Microwave cooking 1.55 kW Approx. 7 A
Grill cooking 1.25 kW Approx. 5 A
Dual cooking 2.75 kW Approx. 12 A
Grill cooking 1.25 kW Approx. 5 A
Dual cooking 2.75 kW Approx. 12 A
Power Output
900W watts nominal of RF microwave energy
(measured by way of IEC 705) Operating frequency of 2450 MHz
(measured by way of IEC 705) Operating frequency of 2450 MHz
Grill Heating Element Power Output
1200W (600W x 2)
Case Dimensions
Width 520mm Height 305mm including foot Depth 413mm
Cooking Cavity Dimensions
Width 342mm Height 207mm Depth 368mm
Turntable diameter
325mm
Control Complement
Touch Control System Clock(1:00-12:59 or 0:00-23:59)
Timer (0-99 minutes 90 seconds)
Microwave Power for Variable Cooking Repetition Rate;
Timer (0-99 minutes 90 seconds)
Microwave Power for Variable Cooking Repetition Rate;
HIGH Full power throughout the cooking time
MEDIUM HIGH approx. 70% of Full Power
MEDIUM approx. 50% of Full Power
MEDIUM LOW approx. 30% of Full Power
LOW ... approx. 10% of Full Power
MEDIUM HIGH approx. 70% of Full Power
MEDIUM approx. 50% of Full Power
MEDIUM LOW approx. 30% of Full Power
LOW ... approx. 10% of Full Power
FUNCTION KEYS:
AUTO COOK keys
INSTANT COOK keys
AUTO DEFROST key LESS ( )/MORE ( ) keys,
Time keys
MICROWAVE POWER LEVEL key,
GRILL key
DUAL GRILL key, STOP/CLEAR key,
TIMER key
AUTO MINUTE/START key
AUTO START CLOCK key
WEIGHT keys
Set Weight
Approx. 18 kg
As part of our policy of continuous improvement, we reserve the
right to alter design and specifications without notice
right to alter design and specifications without notice
3
753M -
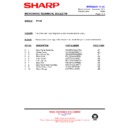
IMPORTANT
When the oven door is closed, the monitor switch contacts
COM - NC must be open.
When the oven door is closed, the monitor switch contacts
COM - NC must be open.
MICROWAVE COOKING CONDITION
HIGH COOKING
When the door is opened during a cook cycle, the switches
come to the following condition.
come to the following condition.
CONDITION
DURING
DOOR OPEN
SWITCH
CONTACT
COOKING
(NO COOKING)
Monitored latch switch
COM-NO
Closed
Open
Monitor switch
COM-NC
Open
Closed
COM-NO
Closed
Open
Stop switch
COM-NO
Closed
Open
When the oven door is opened and the contacts of the
monitored latch switch SW1 remain closed, the fuse F8A
will blow.
monitored latch switch SW1 remain closed, the fuse F8A
will blow.
FUNCTION OF IMPORTANT COMPONENTS
DOOR OPEN MECHANISM
Figure D-1. Door Open Mechanism
LATCH
HEAD
HEAD
DOOR
LATCH
HOOK
HOOK
MONITOR
SWITCH
SW2
SWITCH
SW2
MONITORED
SWITCH
SW1
SWITCH
SW1
STOP
SWITCH
SW3
SWITCH
SW3
DOOR OPEN BUTTON
OPEN LEVER
MONITORED LATCH SWITCH SW1
STOP SWITCH SW3
STOP SWITCH SW3
1. When the oven door is closed, the contacts (COM-
NO) must be closed.
2. When the oven door is opened, the contacts (COM-
NO) must be opened.
MONITOR SWITCH SW2
I
I
f the oven door is opened and the contacts
(COM-NO) of the monitored latch switch SW1 fail
to open, the fuse F8A blows simultaneously with
closing the contacts (COM-NC) of the monitor
switch SW2.
to open, the fuse F8A blows simultaneously with
closing the contacts (COM-NC) of the monitor
switch SW2.
CAUTION: BEFORE REPLACING A BLOWN
FUSE F8A TEST THE MONITORED
LATCH SWITCH SW1, MONITOR
SWITCH SW2.
LATCH SWITCH SW1, MONITOR
SWITCH SW2.
OPERATING SEQUENCE
MEDIUM HIGH, MEDIUM, MEDIUM LOW, LOW
COOKING
COOKING
The following levels of microwave power are given.
SETTING
DUAL COOKING CONDITION
1. The contact of monitored latch switch SW1 are
closed.
2. The relay RY1, RY2 and RY3 are energised.
3. When cooking in dual mode the microwave power is
3. When cooking in dual mode the microwave power is
limited to 70% (via the I.C.).
32 sec. ON
24 sec. ON
18 sec. ON
12 sec. ON
6 sec. ON
8 sec. OFF
14 sec. OFF
20 sec. OFF
26 sec. OFF
HIGH
MEDIUM HIGH
MEDIUM
MEDIUM LOW
LOW
Approx. 70%
Approx 100%
Approx. 50%
Approx. 30%
Approx. 10%
4
753M -
A
MICROWAVE OUTPUT POWER
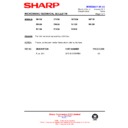
The power output of this oven is rated using the method specified by IEC-60705. Full
details of how to carry out this
procedure can be found in the Sharp Technical Training notes which is available from
Sharp Parts Centre
(part number SERV-LITMW01).
details of how to carry out this
procedure can be found in the Sharp Technical Training notes which is available from
Sharp Parts Centre
(part number SERV-LITMW01).
The IEC-60705 procedure must be carried out using laboratory-type procedures
and equipment.
and equipment.
These requirements make the procedure unsuitable for routine performance checks.
Note: The following test method gives an indication of the output power only, it cannot
be used to establish the actual/rated output power. If the true output power is
required, then the IEC-60705 test method must be used.
be used to establish the actual/rated output power. If the true output power is
required, then the IEC-60705 test method must be used.
Alternative simplified method:
1.
1.
Place 2 litres of cold water (between 12
°
C and 20
°
C) in a suitable container.
2.
Stir the water and measure the temperature in
°
C. Note temperature as T1.
3.
Place the container in the microwave and heat the water for 2 minutes on full power.
4.
When the 2 minutes is completed, remove the container and stir the water. Note the
water temperature as T2.
water temperature as T2.
5.
Calculate the output power using the following formula:
R.F. Power Output = (T2 - T1) x 70.
R.F. Power Output = (T2 - T1) x 70.
Note: The result from this test should be within the allowance of 2000cc alternative
method. (+ 10%).
method. (+ 10%).
MICROWAVE LEAKAGE TEST
This oven should be tested for microwave leakage on completion of any repair or
adjustment, following the procedure described in the Sharp Technical Training notes
(part number SERV-LITMW01). The maximum leakage permitted in BS EN 60335-2-25
is 50W/m
adjustment, following the procedure described in the Sharp Technical Training notes
(part number SERV-LITMW01). The maximum leakage permitted in BS EN 60335-2-25
is 50W/m
2
(equivalent to 5mW/cm
2
), however it is not normal to detect any significant
leakage, therefore, any leakage which is detected should be investigated.
It is essential that only leakage detectors with current calibration traceable to the National
Physical Laboratories are used.
Physical Laboratories are used.
Suitable leakage detectors :
CELTEC A100
APOLLO X1
APOLLO X1
TEST PROCEDURES
PROCEDURE
LETTER
COMPONENT TEST
5
753M -
B
TOUCH CONTROL PANEL ASSEMBLY TEST
PROCEDURE
LETTER
COMPONENT TEST
C
KEY UNIT TEST
TEST PROCEDURES
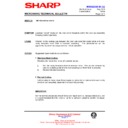
The touch control panel consists of circuits including semiconductors such as LSI, ICs, etc. Therefore,
unlike conventional microwave ovens, proper maintenance cannot be performed with only a voltmeter
and ohmmeter.
In this service manual, the touch control panel assembly is divided into two units, Control Unit and Key
Unit, and also the control unit is divided into two units, CPU Unit and Power Unit, and troubleshooting
by unit replacement is described according to the symptoms indicated.
1. Key Unit
The following symptoms indicate a defective key unit. Replace the key unit.
a) When touching the pads, a certain pad produces no signal at all.
b) When touching a number pad, two figures or more are displayed.
c) When touching the pads, sometimes a pad produces no signal.
a) When touching the pads, a certain pad produces no signal at all.
b) When touching a number pad, two figures or more are displayed.
c) When touching the pads, sometimes a pad produces no signal.
2. Control Unit
The following symptoms indicate a defective control unit. Replacing the control unit.
2-1 In connection with pads.
a) When touching the pads, a certain group of pads do not produce a signal.
b) When touching the pads, no pads produce a signal.
b) When touching the pads, no pads produce a signal.
2-2 In connection with indicators
a) At a certain digit, all or some segments do not light up.
b) At a certain digit, brightness is low.
c) Only one indicator does not light.
d) The corresponding segments of all digits do not light up; or they continue to light up.
e) Wrong figure appears.
f) A certain group of indicators do not light up.
g) The figure of all digits flicker.
b) At a certain digit, brightness is low.
c) Only one indicator does not light.
d) The corresponding segments of all digits do not light up; or they continue to light up.
e) Wrong figure appears.
f) A certain group of indicators do not light up.
g) The figure of all digits flicker.
2-3 Other possible problems caused by defective control unit.
a) Buzzer does not sound or continues to sound.
b) Clock does not operate properly.
c) Cooking is not possible.
b) Clock does not operate properly.
c) Cooking is not possible.
If the display fails to clear when the STOP/CLEAR pad is depressed, first verify the flat ribbon cable is
making good contact, verify that the door sensing switch (stop switch) operates properly; that is the
contacts are closed when the door is closed and open when the door is open. If the door sensing switch
(stop switch) is good, disconnect the flat ribbon cable that connects the key unit to the control unit and make
sure the door sensing switch is closed (either close the door or short the door sensing switch connecter).
Use the Key unit matrix indicated on the STOP/CLEAR pad making momentary contact. If the control unit
responds by clearing with a beep the key unit is faulty and must be replaced. If the control unit does not
respond, it is a faulty and must be replaced. If a specific pad does not respond, the above method may be
used (after clearing the control unit) to determine if the control unit or key pad is at fault.
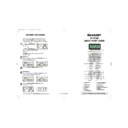
G 9
G10
G11
G12
G 1
G 2
G 3
G 4
G 5
G 6
G 7
G 8
AUTO
START
ROST
BEEF/
LAMB
MICROWAVE
POWER
LEVEL
AUTO
COOK
CHICKEN
PORTIONS
ROST
PORK
PORK
ROST
POULTRY
MINCED
MEAT
SOUP
LESS
KITCHEN
TIMER
DUAL
GRILL
Express
DEFROST
STOP/
CLEAR
CLOCK
Kg / Lb
10 min.
1 min.
10 sec.
START
AUTO
MINUTE
DOWN
MORE
UP
GRILL
KEY UNIT

