Sharp R-465 (serv.man2) Service Manual ▷ View online
R-465(SL)
SERVICING
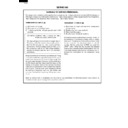
WARNING TO SERVICE PERSONNEL
Microwave ovens contain circuitry capable of producing very high voltage and current, contact with following parts
of the high voltage circuit will result in electrocution. High voltage capacitor, High volyage transformer, Magnetron,
High voltage rectifier assembly, High voltage fuse, High voltage harness.
of the high voltage circuit will result in electrocution. High voltage capacitor, High volyage transformer, Magnetron,
High voltage rectifier assembly, High voltage fuse, High voltage harness.
REMEMBER TO CHECK 3D
1) Disconnect the supply.
2) Door opened, and wedged open.
3) To discharge the high voltage capacitor, wait for 60
2) Door opened, and wedged open.
3) To discharge the high voltage capacitor, wait for 60
seconds.
WARNING: AGAINST THE CHARGE OF THE
HIGH-VOLTAGE CAPACITOR
The high-voltage capacitor remains charged about
60 seconds after the oven has been switched off.
Wait for 60 seconds and then short-circuit the
connection of the high-voltage capacitor (that is, of
the connecting lead of the high-voltage rectifier)
against the chassis with the use of an insulated
screwdriver.
60 seconds after the oven has been switched off.
Wait for 60 seconds and then short-circuit the
connection of the high-voltage capacitor (that is, of
the connecting lead of the high-voltage rectifier)
against the chassis with the use of an insulated
screwdriver.
Sharp recommend that wherever possible fault-finding
is carried out with the supply disconnected. It may, in
some cases, be necessary to connect the supply after
the outer case has been removed, in this event carry
out 3D checks and then disconnect the leads to the
primary of the power transformer. Ensure that these
leads remain isolated from other components and the
oven chassis. (Use insulation tape if necessary.) When
the testing is completed carry out 3D checks and
reconnect the leads to the primary of the power trans-
former.
REMEMBER TO CHECK 4R
1) Reconnect all leads removed from components
during testing.
2) Replace the outer case (cabinet).
3) Reconnect the supply.
4) Run the oven. Check all functions.
3) Reconnect the supply.
4) Run the oven. Check all functions.
Microwave ovens should not be run empty. To test for
the presence of microwave energy within a cavity,
place a cup of cold water on the oven turntable, close
the door and set the microwave timer for two (2)
minutes. Set the power level to HIGH and push the
START button. When the two minutes has elapsed
(timer at zero) carefully check that the water is now hot.
If the water remains cold carry out 3D checks and re-
examine the connections to the component being
tested.
When all service work is completed, and the oven is fully assembled, the microwave power output should be
checked and microwave leakage test should be carried out.
checked and microwave leakage test should be carried out.
R-465(SL)
1
SERVICE MANUAL
MICROWAVE OVEN
R-465(SL)
GENERAL IMPORTANT INFORMATION
This Manual has been prepared to provide Sharp Corp. Service
engineers with Operation and Service Information.
engineers with Operation and Service Information.
It is recommended that service engineers carefully study the
entire text of this manual, so they will be qualified to render
satisfactory customer service.
entire text of this manual, so they will be qualified to render
satisfactory customer service.
CAUTION
MICROWAVE RADIATION
DO NOT BECOME EXPOSED TO RADIATION FROM
THE MICROWAVE GENERATOR OR OTHER PARTS
CONDUCTING MICROWAVE ENERGY.
THE MICROWAVE GENERATOR OR OTHER PARTS
CONDUCTING MICROWAVE ENERGY.
Service engineers should not be exposed to the microwave
energy which may radiate from the magnetron or other
microwave generating devices if it is improperly used or
connected. All input and output microwave connections,
waveguides, flanges and gaskets must be secured. Never
operate the device without a microwave energy absorbing
load attached. Never look into an open waveguide or
antenna while the device is energized.
WARNING
Never operate the oven until the following points are ensured.
(A) The door is tightly closed.
(B) The door brackets and hinges are not defective.
(C) The door packing is not damaged.
(D) The door is not deformed or warped.
(E) There is not any other visible damage with the oven.
(A) The door is tightly closed.
(B) The door brackets and hinges are not defective.
(C) The door packing is not damaged.
(D) The door is not deformed or warped.
(E) There is not any other visible damage with the oven.
Servicing and repair work must be carried out only by trained
service engineers.
service engineers.
All the parts marked "*" on parts list are used at voltages more
than 250V.
than 250V.
Removal of the outer wrap gives access to potentials above
250V.
250V.
All the parts marked "
∆
" on parts list may cause undue micro-
wave exposure, by themselves, or when they are damaged,
loosened or removed.
loosened or removed.
SHARP CORPORATION
OSAKA, JAPAN
PRODUCT SPECIFICATIONS
APPEARANCE VIEW
OPERATING SEQUENCE
FUNCTION OF IMPORTANT
COMPONENTS
COMPONENTS
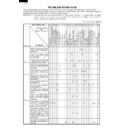
SERVICING AND
TROUBLESHOOTING CHART
TROUBLESHOOTING CHART
TEST PROCEDURE
TOUCH CONTROL PANEL
ASSEMBLY
ASSEMBLY
COMPONENT REPLACEMENT
AND ADJUSTMENT PROCEDURE
AND ADJUSTMENT PROCEDURE
MICROWAVE MEASUREMENT
WIRING DIAGRAM
PARTS LIST
R-465(SL)
3
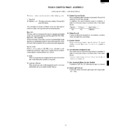
APPEARANCE VIEW
1 Door opening handle
2 Control panel
3 Digital display
4 See through door
7 Door latches
6 Door hinges
7 Door seals and sealing surfaces
8 Coupling
9 Oven cavity
10 Oven lamp
11 Waveguide cover
12 Ventilation openings
13 Outer case cabinet
14 Power cord
15 Turntable
16 Turntable support
2 Control panel
3 Digital display
4 See through door
7 Door latches
6 Door hinges
7 Door seals and sealing surfaces
8 Coupling
9 Oven cavity
10 Oven lamp
11 Waveguide cover
12 Ventilation openings
13 Outer case cabinet
14 Power cord
15 Turntable
16 Turntable support
1. EXPRESS COOK keys
Use to cook 7 popular foods.
2. EXPRESS DEFROST keys
Use to defrost 3 popular foods.
3. INSTANT COOK keys
Use to cook 4 popular foods. menus. (See NOTE.)
4. DIGITAL DISPLAY
5. WEIGHT CONVERSION key
5. WEIGHT CONVERSION key
Use to change weight, e.g. Kg/g to Lb/oz.
6. KITCHEN TIMER key
Press to use as a minute timer, or to programme
standing time.
standing time.
7. TIME key
Use to enter clocking time.
8. POWER LEVEL key
Press to select microwave power level.
TOUCH CONTROL PANEL
9. START/ AUTO MINUTE key
Press to start a programme. Press to cook on 100P for
1 minute on or increase time during cooking in multiples
of 1 minute. (See NOTE.)
1 minute on or increase time during cooking in multiples
of 1 minute. (See NOTE.)
10.STOP/CLEAR key
Press once to stop a programme, twice to cancel a
programme.
programme.
11.LESS/ MORE keys
Press to shorten/ lengthen cooking time.
12.WEIGHT keys
Press up or down to select correct weight/ number of
pieces.
When the minimum (or maximum) weight/ number is
reached, the display will not change, even if you
continue to press the DOWN (or UP) key.
pieces.
When the minimum (or maximum) weight/ number is
reached, the display will not change, even if you
continue to press the DOWN (or UP) key.
13.CLOCK SET key
Use to set the clock or display the time.
14.DELAY START key
Use to programme DELAY START.
NOTE:
The directed features are disabled after three minutes when the oven is not in use. These features are
automatically enabled when the door is opened and closed or the STOP/ CLEAR pad is pressed.
The directed features are disabled after three minutes when the oven is not in use. These features are
automatically enabled when the door is opened and closed or the STOP/ CLEAR pad is pressed.
12
14
13
15
16
Coupling
2
5 4
11 5
7
10
9
1
6
3
8
1
7
9
8
6
5
2
12
11
10
13
14
3
4
R-465(SL)
4
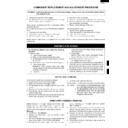
OPERATION SEQUENCE
OFF CONDITION
Closing the door activates all door interlock switches
(1st. latch switch, 2nd. interlock relay control switch).
(1st. latch switch, 2nd. interlock relay control switch).
IMPORTANT
When the oven door is closed, the monitor switch contacts
(COM-NC) must be open.
When the microwave oven is plugged in a wall outlet, rated
voltage is supplied to the noise filter and the control unit.
When the oven door is closed, the monitor switch contacts
(COM-NC) must be open.
When the microwave oven is plugged in a wall outlet, rated
voltage is supplied to the noise filter and the control unit.
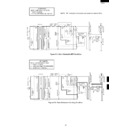
Figure O-1 on page 25
1. The display will show flashing "88:88".
2. To set any programmes or set the clock, you must
2. To set any programmes or set the clock, you must
first touch the STOP/CLEAR pad.
3. : appears in the display.
NOTE: When the oven door is opened, the oven lamp
comes on at this time.
MICROWAVE COOKING CONDITION
HIGH COOKING
Enter a desired cooking time with the touching TIME keys
and start the oven with touching STARTkey.
Enter a desired cooking time with the touching TIME keys
and start the oven with touching STARTkey.
Function sequence
Figure O-2 on page 25
CONNECTED COMPONENTS
RELAY
Oven lamp, Fan motors, Turntable motor
RY1
High voltage transformer
RY2
1. Rated voltage is supplied to the primary winding of the
high voltage transformer. The voltage is converted to
about 3.3 volts A.C. output on the filament winding and
high voltage of approximately 2000 volts A.C. on the
secondary winding.
about 3.3 volts A.C. output on the filament winding and
high voltage of approximately 2000 volts A.C. on the
secondary winding.
2. The filament winding voltage (3.3 volts) heats the
magnetron filament and the high voltage (2000 volts) is
sent to the voltage doubling circuit, where it is doubled
to negative voltage of approximately 4000 volts D.C..
sent to the voltage doubling circuit, where it is doubled
to negative voltage of approximately 4000 volts D.C..
3. The 2450 MHz microwave energy produced in the
magnetron generates a wave length of 12.24 cm. This
energy is channeled through the waveguide (transport
channel) into the oven cavity, where the food is placed
to be cooked.
energy is channeled through the waveguide (transport
channel) into the oven cavity, where the food is placed
to be cooked.
4. When the cooking time is up, a signal tone is heard and
the relays RY1+RY2 go back to their home position.
The circuits to the oven lamp, high voltage transformer,
fan motors and turntable motor are cut off.
The circuits to the oven lamp, high voltage transformer,
fan motors and turntable motor are cut off.
5. When the door is opened during a cook cycle, the
switches come to the following condition
CONDITION
DURING
DURING
DOOR OPEN
SWITCH
CONTACT
COOKING
(NO COOKING)
1st. interlock switch
COM-NO
Closed
Open
2nd. interlock relay
control switch
control switch
COM-NO
Closed
Open
Monitor switch
COM-NC
Open
Closed
The circuits to the high voltage transformer, fan motors
and turntable motor are cut off when the 1st. interlock
switch and 2nd. interlock relay control switch are made
open. The oven lamp remains on even if the oven door
and turntable motor are cut off when the 1st. interlock
switch and 2nd. interlock relay control switch are made
open. The oven lamp remains on even if the oven door
is opened after the cooking cycle has been interrupted,
because the relay RY1 stays closed. Shown in the
display is the remaining time.
because the relay RY1 stays closed. Shown in the
display is the remaining time.
6.
MONITOR SWITCH CIRCUIT
The monitor switch is mechanically controlled by
oven door, and monitors the operation of the 1st.
interlock switch and the relay RY1.
The monitor switch is mechanically controlled by
oven door, and monitors the operation of the 1st.
interlock switch and the relay RY1.
6-1 When the oven door is opened during or after the
cycle of a cooking program, the 1st. interlock switch
and 2nd. interlock relay control switch must open their
contacts first.
After that the contacts (COM-NC) of the monitor
switch can be closed.
and 2nd. interlock relay control switch must open their
contacts first.
After that the contacts (COM-NC) of the monitor
switch can be closed.
6-2. When the oven door is closed, the contacts (COM-
NC) of the monitor switch must be opened. After that
the contacts of the 1st. interlock switch and 2nd.
interlock relay control switch are closed.
the contacts of the 1st. interlock switch and 2nd.
interlock relay control switch are closed.
6-3. When the oven door is opened and the contacts of
the1st. interlock switch and the relay RY1 remain
closed, the fuse F10A will blow, because the monitor
switch is closed and a short circuit is caused.
closed, the fuse F10A will blow, because the monitor
switch is closed and a short circuit is caused.
MEDIUM HIGH, MEDIUM, MEDIUM LOW, LOW
COOKING
COOKING
When the microwave oven is preset for variable cooking
power, rated voltage is supplied to the power transformer
intermittently within a 32-second time base through the
relay contact which is coupled with the current-limiting
relay RY2. The following levels of microwave power are
given.
power, rated voltage is supplied to the power transformer
intermittently within a 32-second time base through the
relay contact which is coupled with the current-limiting
relay RY2. The following levels of microwave power are
given.
SETTING;
NOTE: The ON/OFF time ratio does not exactly correspond
to the percentage of microwave power, because
approx. 3 seconds are needed for heating up the
magnetron filament.
approx. 3 seconds are needed for heating up the
magnetron filament.
POWER OUTPUT REDUCTION
After 100% power cooking mode is carried out for more
than 40 minutes, the power out-put is automatically re-
duced to 70%. Even if the cooking time is shorter than for
40 minutes, the power output is reduced to 70% after total
cooking time over 40 minutes when the oven is started in
100% power cooking mode again within 1 minute and 35
seconds.
than 40 minutes, the power out-put is automatically re-
duced to 70%. Even if the cooking time is shorter than for
40 minutes, the power output is reduced to 70% after total
cooking time over 40 minutes when the oven is started in
100% power cooking mode again within 1 minute and 35
seconds.
100P (HIGH)
32 sec. ON
70P (MEDIUM
HIGH)
Approx. 70%
100%
24 sec. ON
8 sec. OFF
14 sec. OFF
20 sec. OFF
26 sec. OFF
50P (MEDIUM)
Approx. 50%
18 sec. ON
30P (MEDIUM
LOW)
Approx. 30%
12 sec. ON
10P (LOW)
Approx. 10%
6 sec. ON
Display

