Sharp R-1900M (serv.man7) Service Manual ▷ View online
R1900M
6 – 3
[3] C: HIGH VOLTAGE RECTIFIER (1) AND/OR (2) TEST
1. HIGH VOLTAGE RECTIFIERFTEST
1. CARRY OUT 3D CHECKS.
2. Isolate the high voltage rectifier assembly from the HV circuit. The high voltage rectifier can be tested using an ohmmeter set to its highest range.
Connect the ohmmeter across the terminal B+C of the high voltage rectifier and note the reading obtained. Reverse the meter leads and note this
second reading. The normal resistance is infinite in one direction and more than 100k ohms in the other direction.
second reading. The normal resistance is infinite in one direction and more than 100k ohms in the other direction.
3. CARRY OUT 4R CHECKS.
2. ASYMMETRIC RECTIFIER TEST
1. CARRY OUT 3D CHECKS.
2. Isolate the high voltage rectifier assembly from the HV circuit. The asymmetric rectifier can be tested using an ohmmeter set to its highest range
across the terminals A+B of the asymmetric rectifier and note the reading obtained. Reverse the meter leads and note this second reading. If an
open circuit is indicated in both directions then the asymmetric rectifier is good. If the asymmetric rectifier is shorted in either direction, then the
asymmetric rectifier is faulty and must be replaced with high voltage rectifier. When the asymmetric rectifier is defective, check whether magne-
tron, high voltage rectifier, high voltage wire or filament winding of the power transformer is shorted.
3. CARRY OUT 4R CHECKS.
NOTE: Be sure to use an ohmmeter that will supply a forward bias voltage of more than 6.3 volts.
[4] D: HIGH VOLTAGE CAPACITOR (1) AND/OR (2) TEST
1. CARRY OUT 3D CHECKS.
2. If the capacitor is open, no high voltage will be available to the magnetron. Disconnect input leads and check for short or open between the termi-
nals using an ohmmeter.
Checking with a high ohm scale, if the high voltage capacitor is normal, the meter will indicate continuity for a short time and should indicate an
open circuit once the capacitor is charged. If the above is not the case, check the capacitor with an ohmmeter to see if it is shorted between either
of the terminals and case. If it is shorted, replace the capacitor.
open circuit once the capacitor is charged. If the above is not the case, check the capacitor with an ohmmeter to see if it is shorted between either
of the terminals and case. If it is shorted, replace the capacitor.
3. CARRY OUT 4R CHECKS.
[5] E: SECONDARY INTERLOCK SWITCH (1) AND/OR (2) TEST
1. CARRY OUT 3D CHECKS.
2. Isolate the switch and connect the ohmmeter to the common (COM.) and normally open (NO) terminal of the switch. The meter should indicate an
open circuit with the door open and a closed circuit with the door closed. If improper operation is indicated, replace the secondary interlock switch.
3. CARRY OUT 4R CHECKS.
[6] F: PRIMARY INTERLOCK SYSTEM TEST
1. DOOR SENSING SWITCH
1. CARRY OUT 3D CHECKS.
2. Isolate the switch and connect the ohmmeter to the common (COM.) and normally open (NO) terminal of the switch. The meter should indicate an
open circuit with the door open and a closed circuit with the door closed. If improper operation is indicated, replace the door sensing switch.
3. CARRY OUT 4R CHECKS.
2. PRIMARY INTERLOCK RELAY RY1
1. CARRY OUT 3D CHECKS.
2. Disconnect two (2) wire leads from the male tab terminals of the Primary Interlock Relay RY1. Check the state of the relay contacts using a ohm-
meter. The relay contacts should be open. If the relay contacts are closed, replace the circuit board entirely or the relay itself.
3. CARRY OUT 4R CHECKS.
[7] G: MONITOR SWITCH (1) AND/OR (2) TEST
1. CARRY OUT 3D CHECKS.
D2
D1
ASYMMETRIC
RECTIFIER
HIGH VOLTAGE
RECTIFIER
A
B
C
R1900M
6 – 4
2. Before performing this test, make sure that the secondary interlock switches (1), (2) and the primary interlock relay RY1 are operating properly,
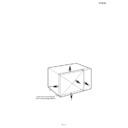
according to the above Switch Test Procedure. Disconnect the wire lead from the monitor switches (1), (2) (COM) terminals. Check the monitor
switches (1), (2) operation by using the ohmmeter as follows. When the door is open, the meter should indicate a closed circuit. When the monitor
switch actuator is pushed by a screw driver through the upper latch hole on the front plate of the oven cavity with the door opened (in this condition
the plunger of the monitor switch is pushed in), the meter should indicate an open circuit. If improper operation is indicated, the switch may be
defective. After testing the monitor switches, reconnect the wire lead to the monitor switch (COM) terminals and check the continuity of the monitor
circuit.
3. CARRY OUT 4R CHECKS.
[8] H: FUSE F10 TEST
1. CARRY OUT 3D CHECKS.
2. If the fuse F10 (1) or (2) is blown when the door is opened, check the primary interlock relay RY1, secondary interlock switches (1), (2) and moni-
tor switches (1), (2) according to the “TEST PROCEDURE” for those switches before replacing the blown fuse F10 (1) or (2).
CAUTION: CAUTION: BEFORE REPLACING A BLOWN FUSE F10 (1) OR (2), TEST THE PRIMARY INTERLOCK RELAY, SECONDARY INTER-
LOCK SWITCHES, DOOR SENSING SWITCH AND MONITOR SWITCHES FOR PROPER OPERATION.
3. If the fuse is blown, check the magnetron, high voltage capacitor, high voltage rectifier assembly, according to the “TEST PROCEDURE” before
replacing the blown fuse. Then replace the fuse.
4. CARRY OUT 4R CHECKS.
[9] I: WEAK POINT (FOR FAN MOTOR OR EXHAUST FAN) TEST
CARRY OUT 3D CHECKS.
If the weak point is blown, the fan motor or exhaust fan could be locked or there could be a shorts in the fan motor or exhaust fan. Check them and
replace the defective parts.
replace the defective parts.
CARRY OUT 4R CHECKS.
CAUTION: Only replace weak point with the correct value replacement.
[10] J: WEAK POINT (IN NOISE FILTER) TEST
CARRY OUT 3D CHECKS.
If the weak point is blown, there could be a shorts or grounds in electrical parts or wire harness. Check them and replace the defective parts or repair
the wire harness.
the wire harness.
CARRY OUT 4R CHECKS.
CAUTION: Only replace weak point with the correct value replacement.
[11] K: TEMPERATURE FUSE TEST
1. CARRY OUT 3D CHECKS.
2. A continuity check across the temperature fuse terminals should indicate a closed circuit unless the temperature of the temperature fuse reaches
specified temperature as shown below.
Open temperature
Close temperature
Display or
Condition
Check point
Magnetron temperature
fuse (1)
fuse (1)
150
°C
Non resetable type
EE1
Magnetron (1) Failure:
Test magnetron (1) and fan motor.
Test magnetron (1) and fan motor.
Magnetron temperature
fuse (2)
fuse (2)
EE2
Magnetron (2) Failure:
Test magnetron (2) and fan motor.
Test magnetron (2) and fan motor.
Magnetron temperature
fuse (1), (2)
fuse (1), (2)
EE3
Magnetron (1), (2) Failure: Test magnetron (1), (2).
Check fan motor and ventilation opening.
Check fan motor and ventilation opening.
Oven temperature fuse
120
°C
Non resetable type
Oven shut off
Food has been burned in oven.
Temperature of oven inside is very high.
Temperature of oven inside is very high.
Screw Driver
Ohmmeter
Monitor switch (2)
Latch hook
Monitor switch (1)
R1900M
6 – 5
3. CARRY OUT 4R CHECKS.
CAUTION: IF THE TEMPERATURE FUSE INDICATES AN OPEN CIRCUIT AT ROOM TEMPERATURE, REPLACE TEMPERATURE FUSE.
[12] L: MAGNETRON THERMISTOR TEST
1. CARRY OUT 3D CHECKS.
2. Disconnect the connector of the magnetron thermistor from the harness. Measure the resistance of the thermistor with an ohmmeter. Connect the
ohmmeter leads to the connector of the thermistor.
If the meter does not indicate above resistance, replace the thermistor.
3. CARRY OUT 4R CHECKS.
[13] M: EXHAUST THERMISTOR TEST
The exhaust thermistor can be checked by using the Special function (SF-6). Check the exhaust thermistor, referring to the pages of the Exhaust ther-
mistor check (SF-6).
mistor check (SF-6).
If the display shows “OH”, the exhaust thermistor is normal. If the display shows “no”, the exhaust thermistor is abnormal and it should be replaced.
[14] N: NOISE FILTER TEST
1. CARRY OUT 3D CHECKS.
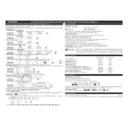
2. Disconnect the lead wires from the terminal the noise filter. Using an ohmmeter, check
between the terminals as described in the following table. If incorrect reading are obtained,
replace the noise filter.
replace the noise filter.
3. CARRY OUT 4R CHECKS.
[15] O: KEY UNIT TEST
1. CARRY OUT 3D CHECKS.
2. Check Key unit ribbon connection before replacement.
3. If key unit ribbon connection is normal, carry out the following procedures.
4. Re-install the rear cover and the outer case (cabinet).
5. Reconnect the power supply cord.
6. The following symptoms indicate a defective key unit.
1) When touching the pads, a certain pad produces no signal at all.
2) When touching a number pad, two figures or more are displayed.
3) When touching the pads, sometimes a pad produces no signal.
7. When you can not judge if the key unit is normal or not by using the item 8 above, carry out following test procedures.
1) Disconnect the power supply cord, and then remove outer case and rear cover.
2) Open the door and block it open.
3) Discharge two high voltage capacitors.
4) Disconnect the leads to the primary of the power transformer.
5) Ensure that these leads remain isolated from other components and oven chassis by using
insulation tape.
6) Reconnect the power supply cord.
Room temperature
Resistance
20
°C
Approx. 750K
Ω
MEASURING POINT
INDICATION OF OHMMETER
Between source terminals
Approx. 470K
Ω
Between source (Black) and load (Black) terminals
Short circuit.
Between source (White) and load (White/Brown) terminals
Short circuit.
WEAK
POINT
NOISE FILTER
NOISE SUPPRESSION COIL
LINE CROSS CAPACITOR
1.0μF / AC 275V
DISCHARGE RESISTOR
470K 1/2W
LINE BYPASS
CAPACITOR
0.0033μF / AC 250V
LINE BYPASS
CAPACITOR
0.0033μF / AC 250V
Load
(Black)
Load
(Gray/White)
Source
(Blue)
Source
(Brown)
5
4
3
2
7
8
9
6
1
2
3
4
3
4
1
5
6
7
2
3
4
3
4
1
5
6
7
2
3
4
3
4
1
5
6
7
8
8
STOP
CLEAR
1
START
3
4
9
5
6
0
7
8
STOP
CLEAR
1
2
X2/X3
START
3
4
9
5
6
0
7
8
CN-M
CN-R
CN-Z
2
CUSTOM
SETTING
SET
MEMORY
EXPRESS
DEFROST
MANUAL
REHEAT
POWER
LEVEL
CN-Q
< DOOR KEY UNIT >
< KEY UNIT >
< SW UNIT >
R1900M
6 – 6
7) If the display fails to clear when the STOP/CLEAR pad is depressed, first verify the flat ribbon cable is making good contact, verify that the door
sensing switch (stop switch) operates properly; that is the contacts are closed when the door is closed and open when the door is open. If the
door sensing switch (stop switch) is good, disconnect the flat ribbon cable that connects the key unit to the control unit and make sure the door
sensing switch is closed (either close the door or short the door sensing switch connector). Use the Key unit matrix indicated on the control
panel schematic and place a jumper wire between the pins that correspond to the STOP/CLEAR pad making momentary contact. If the control
unit responds by clearing with a beep the key unit is faulty and must be replaced. If the control unit does not respond, it is faulty and must be
replaced. If a specific pad does not respond, the above method may be used (after clearing the control unit) to determine if the control unit or
key pad is at fault.
8) For the door key unit, check the open/short and/or connection of the switch unit and the harness, too.
8. If the Key unit is defective.
1) Disconnect the power supply cord, and then remove outer case and rear cover.
2) Open the door and block it open.
3) Discharge two high voltage capacitors.
4) Replace the Key unit.
5) Reconnect all leads removed from components during testing.
6) Re-install the rear cover and the outer case (cabinet).
7) Reconnect the power supply cord after the rear cover and the outer case are installed.
8) Run the oven and check all functions.
[16] P: CONTROL UNIT TEST
The following symptoms indicate a defective control unit. Before replacing the control unit, perform the Key units test (Procedure O) to determine if
control unit is faulty.
control unit is faulty.
Connect the power supply cord. And check for followings.
1. In connection with pads.
1) When touching the pads, a certain group of pads do not produce a signal.
2) When touching the pads, no pads produce a signal.
2. In connection with display
1) At a certain digit, all or some segments do not light up.
2) At a certain digit, brightness is low.
3) Only one indicator does not light.
4) The corresponding segments of all digits do not light up; or they continue to light up.
5) Wrong figure appears.
6) A certain group of indicators do not light up.
7) The figure of all digits flicker.
3. Other possible problems caused by defective control unit.
1) Buzzer does not sound or continues to sound.
2) Cooking is not possible.
4. If the protectors F1 and/or F2 on the control unit PWB are open, the control unit is defective. To check, carry out following procedures.
i)
Disconnect the power supply cord, and then remove outer case and rear cover.
ii) Open the door and block it open.
iii) Discharge two high voltage capacitors.
iv) Remove the control unit from the control panel, referring to “CONTROL PANEL ASSEMBLY AND CONTROL UNIT REMOVAL”.
v) Check the continuity of the protectors F1 and F2 on the control unit
[17] Q: POWER UNIT TEST
1. Check the out put voltage of power unit at CN21 as follows.
i)
Disconnect the power supply cord, and then remove outer case and rear cover.
ii) Open the door and block it open.
iii) Discharge two high voltage capacitors.
iv) Disconnect the leads to the primary of the power transformer.
v) Ensure that these leads remain isolated from other components and oven chassis by using insulation tape.
vi) Check the voltage between Pin No1 and No2 of CN21.
vii) The output voltage should be approx. 24V.
viii) If not so, the power unit is defective.
Display


