Sharp XE-A202 (serv.man3) User Manual / Operation Manual ▷ View online
67
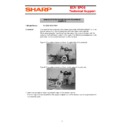
When the printed text is getting dark or faint, paper dust may be stuck to the print head, sensor and/or roller.
Clean them as follows:
Clean them as follows:
Caution:
• Never touch the print head with a tool or anything hard as it may damage the head.
• The paper cutter is mounted on the printer cover. Be careful not to cut yourself.
• Never touch the print head with a tool or anything hard as it may damage the head.
• The paper cutter is mounted on the printer cover. Be careful not to cut yourself.
1.
Turn the mode switch to the “
” position.
2.
Remove the printer cover.
3.
Lift up the print roller release lever to unlock and open the
print roller arm.
print roller arm.
4.
Remove the paper roll referring to the “Removing the
paper roll” section.
paper roll” section.
5.
Clean the print head with a cotton swab or soft rag
moistened with ethyl alcohol or isopropyl alcohol. Clean
the print roller and the sensor in the same manner.
moistened with ethyl alcohol or isopropyl alcohol. Clean
the print roller and the sensor in the same manner.
6.
Reset the paper roll correctly by following the steps in
“Installing the paper roll”.
“Installing the paper roll”.
The till in the register is detachable. After closing your business for the day, remove the till from the drawer and
keep the drawer open. The 8-denomination coin case is also detachable from the till. To detach the drawer, pull
it forward fully with the till removed, and remove it by lifting it up.
keep the drawer open. The 8-denomination coin case is also detachable from the till. To detach the drawer, pull
it forward fully with the till removed, and remove it by lifting it up.
The drawer automatically opens. However, when a power failure occurs or the
machine becomes out of order, slide the lever located on the bottom of the
machine in the direction of the arrow. (See the diagram at the left.)
machine becomes out of order, slide the lever located on the bottom of the
machine in the direction of the arrow. (See the diagram at the left.)
The drawer will not open if it is locked with the key.
Lever
Opening the Drawer by Hand
9
Removing the Till and the Drawer
8
Cleaning the Printer (Print Head / Sensor / Roller)
7
Drawer
Till
Coin case
8-denomination coin case
(detatchable)
Bill case
2
1
Print head
Roller
Sensor
A202_5 OPERATOR MAINTENANCE 03.7.5 8:11 AM Page 67
68
The malfunctions shown in the left-hand column below, labelled “Fault,” do not necessarily indicate functional
faults of the machine. It is therefore advisable to refer to “Checking” shown in the right-hand column before
calling for service.
faults of the machine. It is therefore advisable to refer to “Checking” shown in the right-hand column before
calling for service.
Error code table
When the following error codes are displayed, press the
l
key and take a proper action according to the table
below.
Fault
Checking
The display won’t illuminate even when the mode switch
is turned to any other position than “ ”.
is turned to any other position than “ ”.
• Is power supplied to the electrical outlet?
• Is the power cord plug out or loosely connected to the
AC outlet?
• Is the power cord plug out or loosely connected to the
AC outlet?
(2)
The display shows symbols that do not make sense.
• Has the machine been initialized properly as shown in
“GETTING STARTED”?
(Note that initialization clears all the data and programmed
settings stored in memory.)
“GETTING STARTED”?
(Note that initialization clears all the data and programmed
settings stored in memory.)
(1)
The display is illuminated, but the whole machine
refuses registrations.
refuses registrations.
• Is a clerk code assigned to the register?
• Is the mode switch set properly at the “REG” position?
• Is the mode switch set properly at the “REG” position?
(3)
No receipt is issued.
• Is the paper roll properly installed?
• Is there a paper jam?
• Is the receipt function in the “OFF” status?
• Is the print roller arm securely locked?
• Is there a paper jam?
• Is the receipt function in the “OFF” status?
• Is the print roller arm securely locked?
(4)
No journal paper is taken up.
• Is the take-up spool installed on the bearing properly?
• Is there a paper jam?
• Is the journal printing selected in the printing style
programming? (If the receipt printing is selected, the paper
is not wound around the take-up spool.)
• Is there a paper jam?
• Is the journal printing selected in the printing style
programming? (If the receipt printing is selected, the paper
is not wound around the take-up spool.)
(5)
Printing is unusual.
• Is the print roller arm securely locked?
Open the print roller arm, and lock the arm by following
the instruction of installation.
• Is the paper roll properly installed?
• Are the print head/sensor/roller clean?
Open the print roller arm, and lock the arm by following
the instruction of installation.
• Is the paper roll properly installed?
• Are the print head/sensor/roller clean?
(6)
Continuous printing stops.
• Display shows “– – – – –”.
Printing will automatically restart after several seconds.
Printing will automatically restart after several seconds.
(7)
Before Calling for Service
10
Error
Error status
Action
code
E01
Registration error
Make a correct key entry.
E02
Misoperation error
Make a correct key entry.
E03
Undefined code is entered.
Enter a correct code
E07
Memory is full (in the
a
key programming).
Program the
a
key within 25 steps.
E11
Compulsory depression of the
s
key for
Press the
s
key and continue the operation.
direct finalization
E12
Compulsory tendering
Make a tendering operation.
E32
No entry of a clerk code
Make a clerk code entry.
E34
Overflow limitation error
Make a registration within a limit of entry.
E35
The open price entry is inhibited.
Make a preset price entry.
E36
The preset price entry is inhibited.
Make an open price entry.
E37
The direct finalization is inhibited.
Make a tendering operation.
E67
Subtotal void is not allowed.
Finalize the transaction, and correct the wrong entries in the
mode.
A202_5 OPERATOR MAINTENANCE 03.7.5 8:11 AM Page 68
BLUE:
BROWN:
BROWN:
Neutral
Live
Live
As the colours of the wires in the mains lead of this apparatus may not correspond with the coloured
markings identifying the terminals in your plug proceed as follows.
The wire which is coloured BLUE must be connected to the terminal which is marked with the letter
N or coloured black.
The wire which is coloured BROWN must be connected to the terminal which is marked with the
letter L or coloured red.
The apparatus must be protected by a 3A fuse in the mains plug or distribution board.
CAUTION: DO NOT CONNECT THE LIVE (BROWN) WIRE OR THE NEUTRAL (BLUE) WIRE
TO THE EARTH TERMINAL OF YOUR 3-PIN MAINS PLUG.
Environment Protection
The device is supported by a battery. To dispose the battery safely to protect the environment,
please note the following points:
• Take the used battery to your local waste depot, dealer or customer service centre for recycling.
• Do not throw the used battery into fire, into water or into the household waste!
Umweltschutz
Das Gerät wird durch eine Batterie gestützt. Um die Batterie sicher und umweltschonend zu
entsorgen, beachten Sie bitte folgende Punkte:
• Bringen Sie die leere Batterie zu Ihrer örtlichen Mülldeponie, zum Händler oder zum
Kundenservice-Zentrum zur Entsorgung.
• Werfen Sie die leere Batterie niemals ins Feuer, ins Wasser oder in den Hausmüll.
Protection de l’environnement
L’appareil est supporté sur pile. Afin de protéger l’environnement, nous vous recommendons de
traiter la pile usagée la façon suivante:
• Apporter la pile usagée à votre centre de traitement des ordures ménagères le plus proche ou,
à votre revendeur ou, au service après-vente, pour recyclement.
• Ne jamais jeter la pile usagée dans une source de chaleur, dans l’eau ou dans les vide-ordures.
Miijöskydd
Denna produkt nöddrivs av batteri.
Vid batteribyte skall följande iakttagas:
• Det förbrukade batteriet skall inlämnas till er lokala handlare eller till kommunal miljöstation för
återinssamling.
• Kasta ej batteriet i vattnet eller i hushållssoporna. Batteriet får ej heller utsätttas för öppen eld.
Bescherming van het milieu
Deze kassa gebruikt een batterij. Bescherm het milieu en gooi een gebruikte batterij op de juiste
manier weg. Let op de volgende punten:
• Breng een lege batterij naar de lokale verzamelplaats voor klein chemisch afval, terug naar de
winkel of gooi in een batterijbak.
• Gooi een gebruikte batterij niet in een vuur of water en gooi niet met het gewone huisafval weg.
FOR CUSTOMERS IN U.K.
IMPORTANT
The wires in this mains lead are coloured in accordance with the following code:
Geräuschpegel: 81,1 dB (A)
Gemessen nach DIN 45635 bzw. EN27779
Gemessen nach DIN 45635 bzw. EN27779
A202(Cover2-3) 03.7.5 8:48 AM Page C-3
SHARP CORPORATION
Printed in China / Gedruckt in China / Imprimé en Chine / Impreso en China / Gedrukt in China
KS(TINSM2502RCZZ)
➀

