Sharp XL-DAB151PHBK (serv.man3) Service Manual ▷ View online
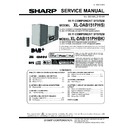
XL-DAB151PH
– 1
CD/USB
RDS
DAB
iPhone, iPod, iPod classic, iPod nano, and iPod touch are
trademarks of Apple Inc., registered in the U.S. and other
countries. iPad is a trademark of Apple Inc.
trademarks of Apple Inc., registered in the U.S. and other
countries. iPad is a trademark of Apple Inc.
“Made for iPod,” “Made for iPhone,” and “Made for iPad” mean
that an electronic accessory has been designed to connect
specifically to iPod, iPhone, or iPad, respectively, and has been
certified by the developer to meet Apple performance standards.
Apple is not responsible for the operation of this device or its
compliance with safety and regulatory standards. Please note
that the use of this accessory with iPod, iPhone, or iPad may
affect wireless performance.
PRECAUTIONS FOR USING LEAD-FREE SOLDER
CHAPTER 1. GENERAL DESCRIPTION
[1] Safety Precaution For Service Manual .......
[1] Safety Precaution For Service Manual .......
...... 1-1
[2] Specifications...............................................
...... 1-1
[3] Name Of Parts .............................................
...... 1-2
CHAPTER 2. MECHANICAL DESCRIPTION
[1] Disassembly ................................................ 2-1
[1] Disassembly ................................................ 2-1
CHAPTER 3. FLOWCHART
[1] Troubleshooting ........................................... 3-1
[1] Troubleshooting ........................................... 3-1
CHAPTER 4. MAJOR PART DRAWING
[1] Function Table Of IC.................................... 4-1
[2] FL
[1] Function Table Of IC.................................... 4-1
[2] FL
Display.................................................. 4-11
CHAPTER 5. CIRCUIT DESCRIPTION
[1] Waveforms Of Servo Circuit ........................ 5-1
[2] Voltage......................................................... 5-2
[1] Waveforms Of Servo Circuit ........................ 5-1
[2] Voltage......................................................... 5-2
CHAPTER 6. DIAGRAM
[1] Block
[1] Block
Diagram ............................................. 6-1
CHAPTER 7. CIRCUIT SCHEMATICS AND PARTS
LAYOUT
[1] Notes On Schematic Diagram ..................... 7-1
[2] Type Of Transistor And LED ........................ 7-1
[3] Schematic
LAYOUT
[1] Notes On Schematic Diagram ..................... 7-1
[2] Type Of Transistor And LED ........................ 7-1
[3] Schematic
Diagram ..................................... 7-2
[4] Chart Of Connecting Wires.......................... 7-8
[5] Wiring Side Of PWB .................................... 7-9
[5] Wiring Side Of PWB .................................... 7-9
PARTS GUIDE
SERVICE MANUAL
No. S6114XLD151KH
CONTENTS
HI FI COMPONENT SYSTEM
MODEL
XL-DAB151PH(S) Hi Fi Component System consisting of
XL-DAB151PH(S) (main unit) and CP-HF151H (speaker system).
XL-DAB151PH(S) (main unit) and CP-HF151H (speaker system).
XL-DAB151PH
(
S
)
SHARP CORPORATION
HI FI COMPONENT SYSTEM
MODEL
XL-DAB151PH(BK) Hi Fi Component System consisting of
XL-DAB151PH(BK) (main unit) and CP-HF151H (speaker system).
XL-DAB151PH(BK) (main unit) and CP-HF151H (speaker system).
Parts marked with "
" are important for maintaining the safety of the set. Be sure to replace these parts with
specified ones for maintaining the safety and performance of the set.
!
• In the interests of user-safety (Required by safety regulations in some countries)
the set should be restored to its original condition and only parts identical to those
specified be used.
specified be used.
XL-DAB151PH
(
BK
)
XL-DAB151PH
– 2
1. Employing lead-free solder
Example:
Indicates lead-free solder of tin, silver and copper.
2. Using lead-free wire solder
3. Soldering
When the tip of the soldering bit is blackened during use, file it with steel wool or fine sandpaper.
Be careful when replacing parts with polarity indication on the PWB silk.
Be careful when replacing parts with polarity indication on the PWB silk.
Lead-free wire solder for servicing
Ref No.
Description
Parts No.
When fixing the PWB soldered with the lead-free solder, apply lead-free wire solder. Repairing with
conventional lead wire solder may cause damage or accident due to cracks.
As the melting point of lead-free solder (Sn-Ag-Cu) is higher than the lead wire solder by 40 C, we
recommend you to use a dedicated soldring bit, if you are not familiar with how to obtain lead-free wire solder
or soldering bit, contact our service station or service branch in your area.
As the melting point of lead-free solder (Sn-Ag-Cu) is about 220 C which is higher than the conventional lead
solder by 40 C, and as it has poor solder wet ability, you may be apt to keep the soldering bit in contact with the
PWB for extended period of time. However, since the land may be peeled off or the maximum heat-resistance
temperature of parts may be exceeded, remove the bit from the PWB as soon as you confirm the steady
soldering condition.
Lead-free solder contains more tin, and the end of the soldering bit may be easily corrected. Make sure to turn on
and off the power of the bit as required.
If a different type of solder stays on the tip of the soldering bit, it is alloyed with lead-free solder. Clean the bit
after every use of it.
"MAIN, POWER, DISPLAY, SPEAKER/JACK, AUDIO IN, USB, iPod, KEY PWB" of this model employs lead-free
solder. The LF symbol indicates lead-free solder, and is attached on the PWB and service manuals.
The alphabetical character following LF shows the type of lead-free solder.
solder. The LF symbol indicates lead-free solder, and is attached on the PWB and service manuals.
The alphabetical character following LF shows the type of lead-free solder.
PRECAUTIONS FOR USING LEAD-FREE SOLDER
PWB-A 92L36101512011 MAIN
PWB-B 92L36801512010 POWER
PWB-C 92L36501512010 DISPLAY
PWB-D 92L36401512011 SPEAKER/JACK
PWB-E 92L37101512011 AUDIO
PWB-B 92L36801512010 POWER
PWB-C 92L36501512010 DISPLAY
PWB-D 92L36401512011 SPEAKER/JACK
PWB-E 92L37101512011 AUDIO
IN
PWB-F 92L36901512011 USB
PWB-G 92L36601512010 iPod
PWB-H 92L37201512011 KEY
PWB-G 92L36601512010 iPod
PWB-H 92L37201512011 KEY
i
XL-DAB151PH
1 – 3
CHAPTER 1. GENERAL DESCRIPTION
[1] Safety Precaution For Service Manual
[2] Specifications
General
Amplifier
Tuner
USB
Speaker
( * )This power consumption value is obtained when the
demonstration mode is cancelled in the power stand-by mode.
Frequency range
FM: 87.5 - 108 MHz
DAB: 174.928 - 239.200 MHz
DAB: 174.928 - 239.200 MHz
This product is classified as a CLASS 1 LASER PRODUCT.
Precaution to be taken when replacing and servicing the
Laser Pickup.
Laser Pickup.
The AEL (Accessible Emission Level) of Laser Power Output is
less than Class 1 but the laser component is capable of emitting
radiation exceeding the limit for Class 1. Therefore it is important
that the following precautions must be observed during servicing
to protect your eyes against exposure to the Laser beam.
less than Class 1 but the laser component is capable of emitting
radiation exceeding the limit for Class 1. Therefore it is important
that the following precautions must be observed during servicing
to protect your eyes against exposure to the Laser beam.
(1) When the cabinet has been removed, the power is turned on
without a compact disc, and the Pickup is on a position outer
than the lead-in position, the Laser will light for several
seconds to detect a disc. Do not look into the Pickup Lens.
(2) The Laser Power Output of the Pickup inside the unit and
replacement service parts have already been adjusted prior
to
shipping.
(3) No adjustment to the Laser Power should be attempted when
replacing or servicing the Pickup.
(4) Under no circumstances look directly into the Pickup Lens at
any
any
time.
(5) CAUTION -Use of controls or adjustments, or performance of
procedures other than those specified herein may result in
hazardous radiation exposure.
Laser Diode Properties
Material:
Material:
AIGaAs
Wavelength: 790 nm
Emission Duration: continuous
Emission Duration: continuous
Laser Output: max. 0.7 mW
CD player
USB host interface
Complies with USB 1.1 (Full Speed)/
2.0 Mass Storage Class.
Support Bulk only and CBI protocol.
2.0 Mass Storage Class.
Support Bulk only and CBI protocol.
Support file
MPEG 1 Layer 3
WMA (Non DRM)
WMA (Non DRM)
Bitrate support
MP3 (32 ~ 320 kbps)
WMA (64 ~ 160 kbps)
WMA (64 ~ 160 kbps)
Other
Maximum total number of MP3/WMA files
is
is
999.
Maximum total number of folders is 99
INCLUSIVE of root directory.
The ID3TAG information supported are
TITLE, ARTIST and ALBUM only.
Supports ID3TAG version 1 and version 2.
INCLUSIVE of root directory.
The ID3TAG information supported are
TITLE, ARTIST and ALBUM only.
Supports ID3TAG version 1 and version 2.
File system
support
support
Support USB devices with Microsoft
Windows/DOS/FAT12/FAT 16/ FAT 32.
2 kbyte block length for sector.
Windows/DOS/FAT12/FAT 16/ FAT 32.
2 kbyte block length for sector.
40 (FM station)
Preset
ADVERSEL-SYNLIG OG USYNLIG LASERSTRÅLING VED
ÅBNING.SE IKKE IND I STRÅLEN-HELLER IKKE MED OPTISKE
INSTRUMENTER. VARO!
ÅBNING.SE IKKE IND I STRÅLEN-HELLER IKKE MED OPTISKE
INSTRUMENTER. VARO!
AVATTAESSA OLET
ALTTIINA
NÄKYVÄLLE JA NÄKYMÄTTÖMÄLLE LASERSÄTEILYLLE ÄLÄ
TUIJOTA SÄTEESEEN ÄLÄKÄ KATSOSITÄ OPTISEN
LAITTEEN LÄPI. VARNING-SYNLIG OCH OSYNLIG LASER-
STRÅLNING NÄR DENNA DEL ÄR ÖPPNAD. STIRRA EJ IN
I STRÅLEN OCH BETRAKTA EJ STRÅLEN GENOM
OPTISKT INSTRUMENT.
TUIJOTA SÄTEESEEN ÄLÄKÄ KATSOSITÄ OPTISEN
LAITTEEN LÄPI. VARNING-SYNLIG OCH OSYNLIG LASER-
STRÅLNING NÄR DENNA DEL ÄR ÖPPNAD. STIRRA EJ IN
I STRÅLEN OCH BETRAKTA EJ STRÅLEN GENOM
OPTISKT INSTRUMENT.
Power source
AC 220 - 240 V ~ 50/60 Hz
Power consumption
Power on: 45 W
Power stand-by: 0.4 W (*)
Power stand-by: 0.4 W (*)
Dimensions
Width: 215 mm (8 - 1/2")
Height: 96 mm (3 - 4/5")
Depth: 335 mm (13 - 1/5")
Height: 96 mm (3 - 4/5")
Depth: 335 mm (13 - 1/5")
Weight
3.4 kg (7.5 lbs.)
Output power
PMPO: 120 W
MPO: 60 W (30 W + 30 W) (10% T.H.D.)
RMS: 30 W (15 W + 15 W) (10% T.H.D.)
RMS: 24 W (12 W + 12 W) (1% T.H.D.)
MPO: 60 W (30 W + 30 W) (10% T.H.D.)
RMS: 30 W (15 W + 15 W) (10% T.H.D.)
RMS: 24 W (12 W + 12 W) (1% T.H.D.)
Output terminals
Speakers: 4 ohms
20Hz - 20kHz
Subwoofer Pre-out (audio signal):
200 mV/10 k ohms at 70 Hz
Video output: 1 Vp-p
Headphones: 16 ohms
(recommended: 32 ohms)
20Hz - 20kHz
Subwoofer Pre-out (audio signal):
200 mV/10 k ohms at 70 Hz
Video output: 1 Vp-p
Headphones: 16 ohms
(recommended: 32 ohms)
Input terminals
Audio In (audio signal):
500 mV/47 k ohms
Line in (Analogue input):
500 mV/47 k ohms
500 mV/47 k ohms
Line in (Analogue input):
500 mV/47 k ohms
Type
Single disc multi-play compact disc player
Signal readout
Non-contact, 3-beam semiconductor laser
pickup
pickup
D/A converter
Multi bit D/A converter
Frequency response 20 - 20,000 Hz
Dynamic range
90 dB (1 kHz)
Type
2-way type speaker system
5 cm (2") Tweeter
10 cm (4") woofer
5 cm (2") Tweeter
10 cm (4") woofer
Maximum input
power
power
30 W
Rated input power
15 W
Impedance
4 ohms
Dimensions
Width: 132 mm (5-1/4")
Height: 262 mm (10-5/16")
Depth: 175 mm (6-7/8")
Height: 262 mm (10-5/16")
Depth: 175 mm (6-7/8")
Weight
1.8 kg (4.0 lbs.)/each
1 – 1
XL-DAB151PH
1 – 4
[3] Names Of Parts
Front panel
1. Remote sensor
2. Timer indicator
3. Disc Tray
4. Docking Station for iPod or iPhone
5. Volume Control
6. On/Stand-by Button
7. FUNCTION Button
8. USB Terminal
9. Audio In Socket
10. Headphone Socket
11. Tuner Preset Down, CD/USB Track Down,
2. Timer indicator
3. Disc Tray
4. Docking Station for iPod or iPhone
5. Volume Control
6. On/Stand-by Button
7. FUNCTION Button
8. USB Terminal
9. Audio In Socket
10. Headphone Socket
11. Tuner Preset Down, CD/USB Track Down,
iPod/iPhone Skip Down
12. Tuner Preset Up, CD/USB Track Up,
iPod/iPhone Skip Up
13. Disc/USB Stop Button
14. Disc/USB/iPod/iPhone Play or Pause Button
15. Disc Tray Open/Close Button
14. Disc/USB/iPod/iPhone Play or Pause Button
15. Disc Tray Open/Close Button
Display
1. USB Indicator
2. iPod Indicators
3. CD Indicator
4. DAB+ Indicator
5. MP3 Indicator
6. WMA Indicator
7. RDM (Random) Indicator
8. MEM (Memory) Indicator
9. Repeat Indicator
10. Play/Pause Indicator
11. Tuning FM Indicator
12. FM Stereo Mode Indicator
13. Stereo Station Indicator
14. RDS Indicator
15. PTY Indicator
16. Muting Indicator
17. X-bass Indicator
18. Title Indicator
19. Artist Indicator
20. Folder Indicator
21. Album Indicator
22. File Indicator
23. Track Indicator
24. Daily Timer Indicator
25. Once Timer Indicator
26. Disc Indicator
27. Total Indicator
28. Sleep Indicator
Speaker system
1. Tweeter
2. Woofer
3. Bass Reflex Duct
4. Speaker Wire
2. Woofer
3. Bass Reflex Duct
4. Speaker Wire
4
2
1
3
4
1
9
6
7
8
10
11 12 13 14 15
5
2
3
+
+
1
5 6
7 8 9
10
11
12 14
13 15
28
27
26
24 25
23
22
19
18
21
20
16
17
2
4
3
1 – 2

