Sharp HT-SB60 (serv.man7) Service Manual / Technical Bulletin ▷ View online
AUD 2013 04 08
Date of Issue: 29
th
April 2013
Classification:
White
AUDIO TECHNICAL BULLETIN
Page 5 of 6
Sharp Electronics (UK) Limited
Reference
– TSI-1330003
Revision - 2
White
– Carry out as required
Yellow
– Carry out as required and whenever the unit comes in for service
Red
– Carry out on all units
HDMI FIRMWARE
Firmware Upgrading
Firmware Upgrading
1. Download and install the EP flash application including the USB driver and the firmware (hex
file).
NOTE - The AC cord on the HT-SB60 must be removed before making a connection.
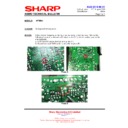
2. Connect the Update Jig to a USB terminal on a PC and the flash cable to the flash terminal
of the HT-SB60 as show in the image below:
3. Plug in the HT-SB60 AC Cord.
Ensure the unit is in stand-by mode.
4. Open the "EP FLASH" programme on PC.
AUD 2013 04 08
Date of Issue: 29
th
April 2013
Classification:
White
AUDIO TECHNICAL BULLETIN
Page 6 of 6
Sharp Electronics (UK) Limited
Reference
– TSI-1330003
Revision - 2
White
– Carry out as required
Yellow
– Carry out as required and whenever the unit comes in for service
Red
– Carry out on all units
A
The PC will auto detect the device port in normal circumstances. If the port is not detected, you
can check via the PC
’s "Device Manager" to identify the port used.
5. Click OpenFile
B
button and select for
the hex file “
EP92A2E for SOME 121011.hex
“ from
the location that you saved it.
6. Press the "START" <
C
>button to start the upgrading.
7. The status bar inside the STATUS column will change to "Write Block : xx" and the counter
will keep increasing.
8. The status bar will change to "Write Block [0-114] OK" when the upgrading is completed.
IMPORTANT: If update failed, "RESET" HT-SB60 by pressing "SOUND MODE" +
"STANDBY" key. Check the wire connection, before proceeding with the update again.
"STANDBY" key. Check the wire connection, before proceeding with the update again.
9. Unplug the HT-SB60 AC cord and remove the FFC cable.
10. Upgrading completed and the unit is ready to be used.
10. Upgrading completed and the unit is ready to be used.
Display

