Sharp HT-SB400H User Manual / Operation Manual ▷ View online
Before using remote control
Before using remote control, please remove
plastic shield at battery holder.
plastic shield at battery holder.
Battery holder
Plastic shield
Remote control
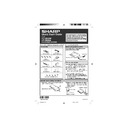
This Quick Start Guide will help you to correctly install and operate your system.
Accessories
SOUND BAR SYSTEM
HT-SB400/
HT-SB500
HT-SB500
Spike x 4
(Length: 25 mm)
Remote control x 1
RCA cable
(2 pins - 2 pins) x 1
Foot cushion x 4
(Spike + Nut) x 4 (Length: 30 mm)
Pattern paper x 1
Wall mount angle x 2
AC power lead x 1
AC/DC adaptor x 1
1
Insert pin into the hole as shown and pull to
open the battery holder.
open the battery holder.
Battery holder
Polarity (+) symbol
Locking tab
Battery type
Positive (+) side up
2
Remove the old battery from the battery
holder, insert the new battery and then
slide the battery holder back into the
remote control.
holder, insert the new battery and then
slide the battery holder back into the
remote control.
09H R AS 1
Back of remote control
Press the ON/STAND-BY button on the remote
control or touch anywhere on the display
panel. All the indicators will be displayed to
indicate pad positions.
control or touch anywhere on the display
panel. All the indicators will be displayed to
indicate pad positions.
I
I
I
I
I
The power indicator turns green. If the
power does not turn on, check whether the
power lead is plugged in properly.
power does not turn on, check whether the
power lead is plugged in properly.
To set the speaker to stand-by mode:
I
I
I
I
I
Press the ON/STAND-BY button again on
the remote control or touch ON/STAND-BY
pad on the speaker.
The STAND-BY indicator turns orange.
the remote control or touch ON/STAND-BY
pad on the speaker.
The STAND-BY indicator turns orange.
Nut
Turn on your system
Remote control battery installation
MODEL
Pin
TINSEA312AWZZ
HT-SB400/500 QG
8/12/09, 4:55 PM
1
Make sure to unplug the AC power lead before installing the speaker or changing the position.
Speaker preparation
Select from three installation methods according to the preferred position.
Using spikes
Tighten all spikes
as shown.
as shown.
Option 1
You may choose from the two different spikes
length provided:
25 mm and 30 mm.
Nuts (secured on 30 mm spikes) must be used
when installing either the 25 mm or 30 mm
spikes.
The speaker can be leveled by adjusting the
spikes and nuts.
length provided:
25 mm and 30 mm.
Nuts (secured on 30 mm spikes) must be used
when installing either the 25 mm or 30 mm
spikes.
The speaker can be leveled by adjusting the
spikes and nuts.
Option 2
Attach foot cushions as shown.
To mount the speaker on the wall
Wall surface
H
H
H
H
H
Wall mount angle fixed to the wall
(Horizontal position)
(Horizontal position)
H
H
H
H
H
Installing the speaker
1
Fix the pattern paper to the wall in
horizontal position as below.
horizontal position as below.
2
Make a hole on the wall following the
screw point marks on the pattern paper by
using a drill.
screw point marks on the pattern paper by
using a drill.
3
Fix a wall mount plug into the hole using
a hammer, until it is flush with the wall
surface.
a hammer, until it is flush with the wall
surface.
4
Screw the wall mount angle to the wall as
shown in the illustration. (Total screw is 8
pieces).
shown in the illustration. (Total screw is 8
pieces).
1
Align the wall mount slot at the speaker to
the wall mount angle.
the wall mount angle.
2
Slot the speaker into the wall mount
angle.
angle.
3
Fix them securely.
Using foot cushions
Option 1
Option 2
Wall surface
Pattern paper
29 mm
29 mm
44 mm
44 mm
509 mm
Wall surface
Wall mount angle
Wall mount angle
(screws x 4)
(screws x 4)
HT-SB400/500 QG
8/12/09, 4:55 PM
2
Display

