Sharp AY-X08 (serv.man13) Service Manual ▷ View online
38
AH/AY-X08CR
AH/AY-X10CR
AH/AY-X13CR
AH/AY-X10CR
AH/AY-X13CR
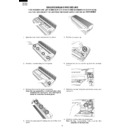
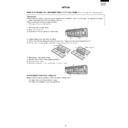
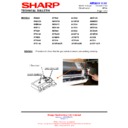
Drain pan and related
1. Remove 3 screws fixing motors.
2. Turn the cap area of the drain hose counterclockwise,
and remove it from the drain pan.
During installation, turn the drain hose to the state of
the “engagement position”.
After reinstallation, verify that it is securely fastened.
During installation, turn the drain hose to the state of
the “engagement position”.
After reinstallation, verify that it is securely fastened.
How to remove the horizontal louver
Slightly pull down the hinge area, defelect thge louver,
and unhook it from the hinge. Remove the shaft from
each of the left and right sides.
Slightly pull down the hinge area, defelect thge louver,
and unhook it from the hinge. Remove the shaft from
each of the left and right sides.
Drain pan
Drain Hose
Groove
Projection
To disconned
To reconnect
39
AH/AY-X08CR
AH/AY-X10CR
AH/AY-X13CR
AH/AY-X10CR
AH/AY-X13CR
FOR OUTDOOR UNIT [AU-X08CR/X010CR/X13CR, AE-X08CR/X010CR/X13CR]
CAUTION : DISCONNECT THE UNIT FROM THE POWER SUPPLY BEFORE ANY
SERVICING
1. Loose a screw fixing the side cover.
Right side view
Left side view
Right side view
Left side view
Front view
2. Loose the unit to unit cord.
3. Loose a screw fixing the cord clamp.
4. Loose 4 screws fixing the top panel.
5. Loose 6 screws fixing the front panel.
6. Cut 4 nylon bands.
7. Disconnect following connectors and each wire.
Choke coil(two terminal)
Fan motor
Thermistor
Reverse valve (AE-X08CR/10CR/13CR)
Fan motor
Thermistor
Reverse valve (AE-X08CR/10CR/13CR)
40
AH/AY-X08CR
AH/AY-X10CR
AH/AY-X13CR
AH/AY-X10CR
AH/AY-X13CR
8. Remove the terminal cover of compressor.
9. Remove 3 terminals of compressor..
10. Loose 4 screws fixing the control box.
11. Take out the control box.
DISASSEMBLING PROCEDURE OF THE FAN
1. Loose the fan nut and fan can take out.
2. Fan motor is secured by 4 screws.
Loose
Display

