Sharp AU-X08 (serv.man15) Service Manual ▷ View online
57
AH/AY-X08CR
AH/AY-X10CR
AH/AY-X13CR
AH/AY-X10CR
AH/AY-X13CR
h) After securing the caps on the control valves, check the capsÅf periphery if there is any gas leakage.
3
4
7
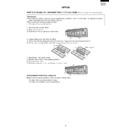
Fig. 6 Configuration of Air Purge by Vacuum Pump
(2) Additional Refrigerant Charging Required for Refrigerant Piping Length Longer Than Standard Length (The
following steps should be taken following the step e) in (1) above. See Fig. 7)
a) Set the refrigerant cylinder to the electronic balance, and connect the connecting hoses on the cylinder and
electronic balanceÅfs connecting port.
CAUTION
Be sure to make setting so that liquid con be charged. When using a cylinder equipped with a siphon, liquid
can be charged without turning it upside down.
can be charged without turning it upside down.
b) Connect the gauge manifoldÅfs charge hose to the electronic balanceÅfs connecting port.
3
2
c) Open the refrigerant cylindesÅfs valve, and, after opening the charging valve a little, close it.
1
2
d) After making zero (0) adjustment, open the charging valve and, by opening the gauge maniflod's valve Lo,
charge the liquid refrigerant.
2
5
e) When the designated amount of refrigrant could not be charged, make additional charging bit by bit by cooling
operation (for the amount of each addition, follow the instruction manual prepared by the equipment
manufacturer) . If the first additional charging was not enough, make the second additional charging after about
one miunte in the same manner as the first additional charging.
manufacturer) . If the first additional charging was not enough, make the second additional charging after about
one miunte in the same manner as the first additional charging.
CAUTION
Be sure never to charge a large amount of liquid refrigerant at once to the unit in cooling mode, since liquid
is charged from the gas siede.
f)
After charging liquid refrigerant into the air conditioner by closing the charging valve, stop operation by fully
closing the gauge manifold's valve Lo.
2
5
g) Quickly remove the charge hose from the service port.
6
When stopped halfway, refrigerant being cycled will be released.
Compound pressure
gauge
gauge
Control valve (2-way)
Control valve
(3-way)
(3-way)
Service port
Charge hose
Handle Lo
Handle Hi (always closed)
Charge hose
Gauge manifold
Vacuum pump adapter
Vacuum pump
76cmHg
Caution:
Be sure to use the vacuum pump,
adapter and gauge manifold to refer to
tion manuals beforehand.
Ascertion that the vacuum pump is fille
the level designated on the oil gauge.
Be sure to use the vacuum pump,
adapter and gauge manifold to refer to
tion manuals beforehand.
Ascertion that the vacuum pump is fille
the level designated on the oil gauge.
6
5
1
3
4
7
8
2
58
AH/AY-X08CR
AH/AY-X10CR
AH/AY-X13CR
AH/AY-X10CR
AH/AY-X13CR
h) After securintg the caps on the service port and control valve, check the capsÅfperiphery to see if there is
any gas leakage.
6
7
Refrigerant cylinder
(with syphon)
1
4
5
3
6
7
7
2
(Indoor unit)
(Liquid side)
Control valve
(2-way)
(2-way)
Control valve
(3-way)
(3-way)
Opened
Opened
Service port
Service port
Charging
valve
Electronic balance for
refrigerant charging
(Gas side)
(Outdoor unit)
Fig. 7 Configuration of Additional Refrigerant Charging
3.3 Removal (When Using New Refrigerant Piping)
(1) Removing the Unit
a) Recovery of Refrigerant from the Outdoow Unit by Pump Down
At the time of pump down, use a gauge manifold exclusive for R410A.
Operating the unit in forced cooling mode, recover refrigerant from the outdoor unit.
(For details of reclaiming steps and precautions, see the instruction manual prepared by the equipment
maunfacturer)
Operating the unit in forced cooling mode, recover refrigerant from the outdoor unit.
(For details of reclaiming steps and precautions, see the instruction manual prepared by the equipment
maunfacturer)
Caution:
In the case of an outdoor unit which is inacapable pump down, use a refrigerant recovery unit.
In the case of an outdoor unit which is inacapable pump down, use a refrigerant recovery unit.
b) Removing the Indoor/Outdoor Units
Remove the piping and wiring between the indoor an outdoor units.
Tighten the outdoor unitÅfs control valves and service port with the specified torque.
Tighten the capped flare nuts at the indoor/outdoor units connecting part with the specified torque.
Remove the indoor/outdoor units.
Tighten the outdoor unitÅfs control valves and service port with the specified torque.
Tighten the capped flare nuts at the indoor/outdoor units connecting part with the specified torque.
Remove the indoor/outdoor units.
CAUTION
When storing the indoor unit piping in its original position, be careful not to break the piping.
(2) Installing the Unit
a) Proceed with the installation following the steps described in "3.2 New Installation Work" .
3.4 Replacing the Unit (Never Use the Existing Refrigerant Piping)
Use a brand-new refrigerant piping (1) when replacing the air conditioner using the conventional refrigerant (R22)
with an air conditioner using the alternative refrigerant (R410A) or (2) even when replacing the air conditioner using
the alternative refrigerant (R410A) with another air conditioner using R410A, as a problem may occur due to
differences in pressure characteristics of refrigerant or differences in type of lubricating oil (air conditioners using
R410A do not always use the same type of the lubricating oils) .
3.5 Retrofitting
Do not operate the air conditioner which has used the conventional refrigerant (R22) by charging the altemative
refrigerant (R410A) . Otherwise, the equipment may cease to function normally and go wrong, or even cause
serious problems such as rupture of the refrigeration cycle.
refrigerant (R410A) . Otherwise, the equipment may cease to function normally and go wrong, or even cause
serious problems such as rupture of the refrigeration cycle.
59
AH/AY-X08CR
AH/AY-X10CR
AH/AY-X13CR
AH/AY-X10CR
AH/AY-X13CR
3.6 Refrigerant Recharging at Servicing
When it becomes necessary to recharge refrigerant, charge the specified amount of new refrigerant according to
the following steps.
(For details, see the instruction manual prepared by the equipment manufacturer)
1) Connect the charge hose to the outdoor unit's service port.
the following steps.
(For details, see the instruction manual prepared by the equipment manufacturer)
1) Connect the charge hose to the outdoor unit's service port.
2) Connect the charge hose to the vacuum pump abapter. At this time, keep the control valves in the fully
opened position.
3) Place the handle Lo in the fully opened position, and turn ON the vacuum pumpÅfs power source. (For the
evacuating time, refer to the equipment manufacturer's manual)
4) When the compound gauge's pointer has indicated - 0.1 MPa (- 76 cmHg), place the handle Lo in the fully
closed position, and turn OFF the vacuum pump's power source. Keep this state for 1 ~ 2 minutes, and
ascertain that the compound gaugeÅfs pointer does not refurn.
ascertain that the compound gaugeÅfs pointer does not refurn.
5) Charge liquid refrigerant by using the electronic balance according to the steps described in Section 3.2 (2)
(pages 49).
60
AH/AY-X08CR
AH/AY-X10CR
AH/AY-X13CR
AH/AY-X10CR
AH/AY-X13CR
'02 SHARP CORP. (3U0.10E) Printed in Germany

