Sharp AH-A129 (serv.man3) Service Manual / Technical Bulletin ▷ View online
AIR2003 10 01
Month of Issue:
October 2003
Classification:
White
TECHNICAL BULLETIN
Page 2 of 3
Sharp Electronics (UK) Limited
Reference - ARCN-0302-01 a
Revision - 1
White – Carry out as required
Yellow – Carry out as required and whenever the unit comes in for service
Red – Carry out on all units
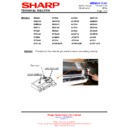
ACTION To check that the gas sensor is working correctly, follow the procedure outlined below:
1. Remove power from the unit.
2. Open the front panel of the indoor unit.
3. Disconnect the wire connected from terminal 2 to the outdoor unit, and insulate the
2. Open the front panel of the indoor unit.
3. Disconnect the wire connected from terminal 2 to the outdoor unit, and insulate the
end. If this wire is not disconnected the outdoor unit could switch on intermittently.
4. Apply power to the unit and at the same time push the AUX switch. A tone will
sound twice.
5. Push AUX switch four times. Some numbers will appear on the display.
6. Use a cigrette lighter to discharge some gas into the latticed inlet for the gas
6. Use a cigrette lighter to discharge some gas into the latticed inlet for the gas
sensor. DO NOT light the gas.
7. Check the numbers indicated on the display. If the value of the numbers on the
display goes up, the sensor is working.
Position of the wire connected to terminal 2
AIR2003 10 01
Month of Issue:
October 2003
Classification:
White
TECHNICAL BULLETIN
Page 3 of 3
Sharp Electronics (UK) Limited
Reference - ARCN-0302-01 a
Revision - 1
White – Carry out as required
Yellow – Carry out as required and whenever the unit comes in for service
Red – Carry out on all units
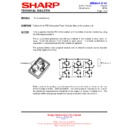
To check that the dust sensor is working correctly, follow the procedure outlined below:
1. Remove power from the unit.
2. Open the front panel of the indoor unit.
3. Disconnect the wire connected from terminal 2 to the outdoor unit, and insulate the
2. Open the front panel of the indoor unit.
3. Disconnect the wire connected from terminal 2 to the outdoor unit, and insulate the
end. If this wire is not disconnected the outdoor unit could switch on intermittently.
4. Apply power to the unit and at the same time push the AUX switch. A tone will sound
twice.
5. Push AUX switch three times. Some numbers will appear on the display.
6. Insert the end of a pencil or ballpoint pen into the sensor inlet hole(this simiulates a
6. Insert the end of a pencil or ballpoint pen into the sensor inlet hole(this simiulates a
large amount of dust) .
7. Check displayed numbers on the display. If the value of the numbers on the display
goes up, the sensor is working.
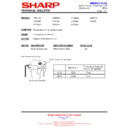
Position of the wire connected to terminal 2
Display


