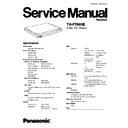
Panasonic TU-PT600E Service Manual ▷ View online
3 About lead free solder (PbF)
Note: Lead is listed as (Pb) in the periodic table of elements.
In the information below, Pb will refer to Lead solder, and PbF will refer to Lead Free Solder.
The Lead Free Solder used in our manufacturing process and discussed below is (Sn+Ag+Cu).
That is Tin (Sn), Silver (Ag) and (Cu) although other types are available.
This model uses Pb Free solder in it’s manufacture due to environmental conservation issues. For service and repair work, we’d
suggest the use of Pb free solder as well, although Pb solder may be used.
suggest the use of Pb free solder as well, although Pb solder may be used.
PCBs manufactured using lead free solder will have the PbF within a leaf Symbol
stamped on the back of PCB.
Caution
·
Pb free solder has a higher melting point than standard solder. Typically the melting point is 50 ~ 70
ー
F (30~40
ー
C) higher.
Please use a high temperature soldering iron and set it to 700 ± 20
ー
F (370 ± 10
ー
C).
·
Pb free solder will tend to splash when heated too high (about 1100
ー
F or600
ー
C).
If you must use Pb solder, please completely remove all of the Pb free solder on the pins or solder area before applying Pb
solder. If this is not practical, be sure to heat the Pb free solder until it melts, before applying Pb solder.
solder. If this is not practical, be sure to heat the Pb free solder until it melts, before applying Pb solder.
·
After applying PbF solder to double layered boards, please check the component side for excess solder which may flow onto
the opposite side. (see figure below)
the opposite side. (see figure below)
Suggested Pb free solder
There are several kinds of Pb free solder available for purchase. This product uses Sn+Ag+Cu (tin, silver, copper) solder.
However, Sn+Cu (tin, copper), Sn+Zn+Bi (tin, zinc, bismuth) solder can also be used.
However, Sn+Cu (tin, copper), Sn+Zn+Bi (tin, zinc, bismuth) solder can also be used.
5
TU-PT600E
4 Self Check
1. Self-Check is used to automatically check the bus lines and hexadecimal code of the TV set.
2. To get into the Self -Check mode press the Down (
) button on the customer controls at the front of the set, at the same
time pressing the Status
button on the remote control, and the screen will show :
If the CCU ports have been checked and found to be incorrect or not located then “--” will appear in place of “O.K.”.
Display
Ref. No.
Description
P.C.B.
MEM
IC1102
EEPROM
A-Board
GC2
IC1304
Global core
DG-Board
CIP
IC1307
CIP
DG-Board
RGB
IC3402
RGB Processor
A-Board
AVSW
IC3002
AV switch
J-Board
TUNER
TNR001
Tuner
A-Board
MSP
IC2001
Multi Sound Processor
A-Board
EXDAC
---
EX DAC
---
PANEL
---
Plasma Display
---
6
TU-PT600E
5 Chasis Board Layout
Board Name
Function
A-Board
Main (AV SW, MSP, RGB, MEM, MCU)
DG-Board
Digital Processor (Global core, CIP)
G-Board
Front AV Terminal
H-Board
Rear AV Terminal
J-Board
Tuner
K-Board
Switch
P-Board
Power
7
TU-PT600E
6 Disassembly for Service
Note:
This flowchart indicates disassembly items of the cabinet parts and circuit boards in order to find the items necessary for
servicing, when reassembling, peform the procedures in the reverse order.
servicing, when reassembling, peform the procedures in the reverse order.
6.1.
Disassembly flowchart
8
TU-PT600E
Click on the first or last page to see other TU-PT600E service manuals if exist.

