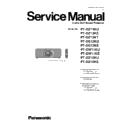
Panasonic PT-DZ13KU / PT-DZ13KE / PT-DZ13KT / PT-DS12KU / PT-DS12KE / PT-DW11KU / PT-DW11KE / PT-DZ10KU / PT-DZ10KE (serv.man2) Service Manual ▷ View online
ORDER NO. VED1304464CE
D10
■
Replacement lamp unit
ET-LAD310A (1 pc)
ET-LAD310AW (2 pcs)
ET-LAD310AW (2 pcs)
■
Replacement filter unit
ET-EMF320
■
Replacement lamp unit
(for portrait mode)
(for portrait mode)
ET‑LAD320P (1 pc)
ET‑LAD320PW (2 pcs)
ET‑LAD320PW (2 pcs)
Rev.-3 (2017-06)
Model No.
3-chip DLP Based Projector
PT-DZ13KU
PT-DZ13KE
PT-DZ13KT
PT-DS12KU
PT-DS12KE
PT-DW11KU
PT-DW11KE
PT-DZ10KU
PT-DZ10KE
PT-DZ13KE
PT-DZ13KT
PT-DS12KU
PT-DS12KE
PT-DW11KU
PT-DW11KE
PT-DZ10KU
PT-DZ10KE
The projection lens is sold separately.
2
The service technician is required to read and follow the “Safety Precautions” and “Important Safety Notice” in this service manual.
CAUTION
Lithium Battery
Precaution
About lead free solder (PbF)
For US
WARNING:
CAUTION :
Any unauthorized changes or modifications to this equipment will void the users authority to operate.
This projector is using the P.C.Board which applies lead free solder.
Use lead free solder in servicing from the standpoint of antipollution for the global environment.
Notes:
Use lead free solder in servicing from the standpoint of antipollution for the global environment.
Notes:
・ Lead free solder: Sn-Ag-Cu (tin, silver and copper) has a higher melting point (approx. 217°C) than standard solder. Typically the melting point
・ is 30~40 °C higher. When servicing, use a high temperature soldering iron with temperature limitation function and set it to 370 ± 10 °C.
・ Be precautious about lead free solder. Sn-Ag-Cu (tin, silver and copper) will tend to splash when heated too high (approx. 600°C or higher).
・ Use lead free solder for the P.C.Board (specified on it as “PbF”) which uses lead free solder. (When you unavoidably use lead solder, use lead
・ solder after removing lead free solder. Or be sure to heat the lead free solder until it melts completely, before applying lead solder.)
・ After soldering to double layered P.C.Boards, check the component side for excess solder which may flow onto the opposite side.
About the identification of the lead free solder P.C.Board.
For the P.C.Board which applies lead free solder, the symbol as shown in the figure below is printed or stamped on the surface
or the back of P.C.Board.
For the P.C.Board which applies lead free solder, the symbol as shown in the figure below is printed or stamped on the surface
or the back of P.C.Board.
There are special parts used in Panasonic LCD Projectors which are important for safety. These parts are shaded on the schematic
diagram. It is essential that these critical parts should be replaced with manufacturer’s specified parts to prevent shock, fire, or other
hazards. Do not modify the original design without permission of PANASONIC SOLUTIONS COMPANY.
diagram. It is essential that these critical parts should be replaced with manufacturer’s specified parts to prevent shock, fire, or other
hazards. Do not modify the original design without permission of PANASONIC SOLUTIONS COMPANY.
IMPORTANT SAFETY NOTICE
This equipment has been tested and found to comply with the limits for a Class A digital device, pursuant to part 15 of the FCC Rules.
These limits are designed to provide reasonable protection against harmful interference when the equipment is operated in a
commercial
environment. This equipment generates, uses, and can radiate radio frequency energy and, if not installed and used in accordance
with
the instruction manual, may cause harmful interference to radio communications. Operation of this equipment in a residential area is
likely
to cause harmful interference in which case the user will be required to correct the interference at his own expense.
WARNING
This service information is designed for experienced repair technicians only and is not designed for use by the general public.
It dose not contain warnings or cautions to advise non-technical individuals of potential dangers in attempting to service a product.
Products powered by electricity should be serviced or repaired only by experienced professional technicians. Any attempt to service
or repair the product or products dealt with in this service information by anyone else could result in serious injury or death.
WARNING : Use UV Radiation eye and skin protection during servicing
If using of this projector at high altitudes (above 1,400m), set HIGHT ALTITUDE MODE to “ON”.
(Refer to “PROJECTOR SETUP menu” in Operating Instructions.)
Failure to observe this may cause malfunctions. Never use this projector at an altitude of 2,700m or higher.
Using this projector at high altitude, consult your dealer or Authorized Service Center about preparations.
(Refer to “PROJECTOR SETUP menu” in Operating Instructions.)
Failure to observe this may cause malfunctions. Never use this projector at an altitude of 2,700m or higher.
Using this projector at high altitude, consult your dealer or Authorized Service Center about preparations.
Risk of explosion if battery is replaced by an incorrect type,
Replace only with the same of equivalent type recommended by the manufacturer.
Dispose of used batteries according to the manufacturer’s instructions.
Replace only with the same of equivalent type recommended by the manufacturer.
Dispose of used batteries according to the manufacturer’s instructions.
or
3
■
Cautions when transporting
・The projection lens (optional) is susceptible to effects due to vibration or impact.
Make sure to remove the lens when transporting.
・When transporting the projector, hold it securely by its bottom and avoid excessive vibration and impacts.
・When transporting the projector, hold it securely by its bottom and avoid excessive vibration and impacts.
They may damage the internal components and result in malfunctions.
・Do not transport the projector with the adjustable feet extended.
・Do not transport the projector with the adjustable feet extended.
Doing so may damage the adjustable feet.
■
Do not set up the projector in the following locations.
・Places where vibration and impacts occur such as in a car or vehicle: Doing so may cause damage to internal
components or malfunction.
・Near the exhaust of an air conditioner: Depending on the conditions of use, the screen may fluctuate in rare cases
・Near the exhaust of an air conditioner: Depending on the conditions of use, the screen may fluctuate in rare cases
due to the heated air from the air exhaust port or the hot or cooled air. Make sure that the exhaust from the projector
or other equipment, or the air from the air conditioner does not blow toward the front of the projector.
・Places with sharp temperature fluctuations such as near lights (studio lamps): Doing so may shorten the life
・Places with sharp temperature fluctuations such as near lights (studio lamps): Doing so may shorten the life
of the lamp, or result in deformation of the outer case due to heat, which may cause malfunctions.
The operating environment temperature of the projector should be between 0 °C (32 °F) and 45 °C (113 °F) when
using it at elevations lower than 1 400 m (4 593') above sea level, and between 0 °C (32 °F) and 40 °C (104 °F) when
using it at high altitudes (1 400 m (4 593') or higher – lower than 2 700 m (8 858') above sea level).
If you use the Smoke cut filter, the operating environment temperature should be between 0 °C (32 °F) and
35 °C (95 °F). However, it cannot be used at high altitudes.
If you use the Replacement lamp unit (for portrait mode), the operating environment temperature should be between
0 °C (32 °F) and 40 °C (104 °F) when using the projector at elevations lower than 1 400 m (4 593') above sea level,
and between 0 °C (32 °F) and 35 °C (95 °F) when using the projector at high altitudes. If you use the Smoke cut filter
together, the operating environment temperature should be between 0 °C (32 °F) and 30 °C (86 °F).
・Near high-voltage power lines or near motors: Doing so may interfere with the operation of the projector.
・Places where there is high-power laser equipment: Directing a laser beam onto the lens surface causes damage
・Near high-voltage power lines or near motors: Doing so may interfere with the operation of the projector.
・Places where there is high-power laser equipment: Directing a laser beam onto the lens surface causes damage
to the DLP chips.
■
Note at the time of installation
・The high clarity projection lens is thermally affected by the light from the light source, making the focus unstable in
the period just after switching on the power. Wait at least 30 minutes with the image projected before adjusting
the period just after switching on the power. Wait at least 30 minutes with the image projected before adjusting
the lens focus.
・Make sure to set [HIGH ALTITUDE MODE] to [ON] when using the projector at elevations between 1 400 m (4 593')
・Make sure to set [HIGH ALTITUDE MODE] to [ON] when using the projector at elevations between 1 400 m (4 593')
or higher and lower than 2 700 m (8 858') above sea level.
Do not install the projector at elevations of 2 700 m (8 858') or higher above sea level.
・Do not use the projector tilted to the right or left.
・When installing and using the projector at an angle that exceeds 30° vertically, set [COOLING CONDITION].
・When using the portrait mode only lamp unit, install the projector with the terminals surface facing down.
・Do not use the projector tilted to the right or left.
・When installing and using the projector at an angle that exceeds 30° vertically, set [COOLING CONDITION].
・When using the portrait mode only lamp unit, install the projector with the terminals surface facing down.
4
1. Safety Precautions
2. Specifications
1. The name of each part
2. Menu Navigation
3. Service Mode
4. External Controls
5. Notification for service operation
6. Troubleshooting
1. Parts Location
2. Disassembly Instructions
3. Wiring
1. Adjustment Procedure
2. Software update procedure
1. Block Diagram
2. Interconnection Block Diagram
3. Schematic Diagram
4. Circuit Boards Diagram
1. Exploded Views
2. Replacement Parts List
■
■
■
■
SECTION 2 <Disassembly Procedures>
SECTION 3 <Adjustment>
SECTION 4 <Schematic Diagrams>
SECTION 5 <Exploded Views & Replacement Parts List>
CONTENTS
■
COVER PAGE
■
SECTION 1 <Service Information>


