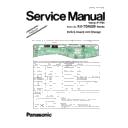
Panasonic KX-TDA620BX (serv.man8) Service Manual / Supplement ▷ View online
ORDER NO. KMS1712002SE
Hybrid IP-PBX
Model No.
KX-TDA620
Series
BUS-S Board Unit Change
Model No.
KX-TDA620
C
A
Suffix
3
Sup No.
KMS0607279CE
Service Manual
Order No.
Please file and use this supplement manual together with the service manual.
When servicing, you must confirm which service manual should be referred by the following methods.
Compatibility
Parts
Set Production
Original
New
Early (before change)
Late (after change)
BUS-S Board Ass'y
Original or new parts may be used in early or late production sets.
Use original parts until exhausted, then stock new parts.
Use original parts until exhausted, then stock new parts.
Single Parts
Original parts may be used in early production sets only.
New parts may be used in late production sets only. Stock both original
and new parts.
New parts may be used in late production sets only. Stock both original
and new parts.
Original
New
Early (before change)
Late (after change)
Refer to “PSUP1513YA”
R214
CN201
1
8
7
14
QA102
CN202
1
7
R
R2
R2
R243
R244
R257
C222
RA313
C223
C224
C225
R267
R268
R269
R270
R271
R272
R273
R274
R275
C241
C242
Q102
C
LED101
L703
R102
R103
J218
R706
R707
R708
R709
R710
R712
R714
R715
R721
R7
R724
C302
C303
R727
C304
R728
R729
C306
C308
R730
RA209
R731
C310
C312
C313
R737
RA210
R738
RA211
R739
RA212
RA21
RA21
RA219
RA220
RA221
RA222
C32
RA223
RA228
RA229
RA230
C720
C722
C723
C733
C738
+
-
C744
C759
C760
C761
C763
C764
D704
C765
D705
27
28
IC305
IC306
C770
SW201
1
2
IC705
1
4
5
8
J104
R207
PSUP1513YA-GW
94V-0
KX-TDA620
IP702
U.S.A.
D
C
3
KX-TDA620AL
KMS0510153CE
Australia
D
C
3
KX-TDA620BR
KMS0604221CE
Brazil
Destination
E
D
7
F)
(E
KX-TDA620BX
(KX-TDA620BX-SX)
KMS0510154CE
Asia, Middle Near East, Latin America
and Africa (India)
and Africa (India)
D
C
5
KX-TDA620EJ
KMS0602205CE
Hong Kong, Malaysia and Singapore
B
A
4
KX-TDA620SU
KMS1003770CE
Saudi Arabia
D
C
6
KX-TDA620TW
KMS0512170CE
Taiwan
2
KX-TDA620 Series
TABLE OF CONTENTS
PAGE
PAGE
1 Safety Precautions -----------------------------------------------3
1.1. For Service Technicians ---------------------------------3
2 Warning --------------------------------------------------------------3
2.1. Information for Users on Collection and
Disposal of Old Equipment and used Batteries-----3
2.2. Battery Caution ---------------------------------------------4
2.3. Caution--------------------------------------------------------4
2.4. About Lead Free Solder (PbF: Pb free) --------------4
2.3. Caution--------------------------------------------------------4
2.4. About Lead Free Solder (PbF: Pb free) --------------4
2.4.1. Suggested PbF Solder -------------------------------4
2.5. Discarding of P. C. Board --------------------------------4
3 Specifications ------------------------------------------------------5
3.1. General Description ---------------------------------------5
3.2. Characteristics ----------------------------------------------5
3.2. Characteristics ----------------------------------------------5
4 Technical Descriptions------------------------------------------6
4.1. Block Diagram ----------------------------------------------6
4.2. BUS-S Card Circuit Operation --------------------------7
4.2. BUS-S Card Circuit Operation --------------------------7
4.2.1. BUS-S Card---------------------------------------------7
4.2.2. Description of Each Part-----------------------------8
4.2.3. Circuit Description-------------------------------------9
4.2.2. Description of Each Part-----------------------------8
4.2.3. Circuit Description-------------------------------------9
4.3. Back Board Circuit Operation ------------------------- 11
4.4. Outline ------------------------------------------------------ 12
4.4. Outline ------------------------------------------------------ 12
4.4.1. General Description--------------------------------- 12
4.5. System Control ------------------------------------------- 13
4.5.1. System Control Block Diagram ------------------ 13
4.5.2. Voice (TDM Highway) Bus Block Diagram---- 14
4.5.3. Voice Bus Logical Assignment ------------------- 15
4.5.4. TDM Signaling --------------------------------------- 15
4.5.2. Voice (TDM Highway) Bus Block Diagram---- 14
4.5.3. Voice Bus Logical Assignment ------------------- 15
4.5.4. TDM Signaling --------------------------------------- 15
4.6. Back Board Signal Connection Diagram ----------- 16
4.6.1. CT Bus System Connection Diagram ---------- 16
4.6.2. EC Bus System Connection Diagram ---------- 17
4.6.3. System Control and Analog Signal
4.6.2. EC Bus System Connection Diagram ---------- 17
4.6.3. System Control and Analog Signal
Connection Diagram-------------------------------- 18
4.6.4. Power Supply System Connection
Diagram------------------------------------------------ 18
5 Location of Controls and Components------------------ 19
5.1. Name and Locations ------------------------------------ 19
5.1.1. Expansion System ---------------------------------- 19
6 Installation Instructions--------------------------------------- 23
6.1. System Overview----------------------------------------- 23
6.1.1. System Connection Diagram --------------------- 23
7 Operating Instructions ---------------------------------------- 25
7.1. System Capacity ----------------------------------------- 25
7.1.1. Number of Free Slots------------------------------- 25
7.1.2. Maximum Trunk and Extension ------------------ 25
7.1.3. Maximum Optional Service Cards -------------- 25
7.1.4. Maximum Terminal Equipment------------------- 26
7.1.5. Power Supply Unit Selection for Each
7.1.2. Maximum Trunk and Extension ------------------ 25
7.1.3. Maximum Optional Service Cards -------------- 25
7.1.4. Maximum Terminal Equipment------------------- 26
7.1.5. Power Supply Unit Selection for Each
Shelf ---------------------------------------------------- 27
8 Troubleshooting Guide---------------------------------------- 29
8.1. BUS-S CARD --------------------------------------------- 29
9 Service Fixture & Tools--------------------------------------- 35
9.1. EXTENSION BOARDS FOR SERVICING -------- 35
10 Disassembly and Assembly Instructions -------------- 36
10.1. BUS-S Card ----------------------------------------------- 36
10.2. Back Board ------------------------------------------------ 37
10.2. Back Board ------------------------------------------------ 37
11 Miscellaneous --------------------------------------------------- 39
11.1. How To Replace a Flat Package IC ----------------- 39
11.1.1. Preparation ------------------------------------------- 39
11.1.2. Removal Procedure -------------------------------- 39
11.1.3. Procedure--------------------------------------------- 39
11.1.4. Removing Solder From Between Pins--------- 39
11.1.2. Removal Procedure -------------------------------- 39
11.1.3. Procedure--------------------------------------------- 39
11.1.4. Removing Solder From Between Pins--------- 39
12 Schematic Diagram -------------------------------------------- 40
12.1. BUS-S Block Diagram ---------------------------------- 40
12.2. BUS-S Board No.1 -------------------------------------- 41
12.3. BUS-S Board No.2 -------------------------------------- 42
12.4. BUS-S Board No.3 -------------------------------------- 43
12.5. BUS-S Board No.4 -------------------------------------- 44
12.6. BUS-S Board No.5 -------------------------------------- 45
12.7. BUS-S Board No.6 -------------------------------------- 46
12.8. BUS-S Board No.7 -------------------------------------- 47
12.9. BB-EXP Board No.1 ------------------------------------ 48
12.10. BB-EXP Board No.2 ------------------------------------ 50
12.11. BB-EXP Board No.3 ------------------------------------ 52
12.12. Waveform -------------------------------------------------- 54
13 Printed Circuit Board------------------------------------------ 55
13.1. BUS-S Board --------------------------------------------- 55
13.1.1. Component View ------------------------------------ 55
13.2. BB-EXP Board-------------------------------------------- 56
13.2.1. Component View ------------------------------------ 56
14 Appendix Information of Schematic Diagram -------- 57
15 Exploded View and Replacement Parts List----------- 58
15 Exploded View and Replacement Parts List----------- 58
15.1. Cabinet and Electrical Parts Location -------------- 58
15.2. Accessories and Packing Material ------------------ 60
15.3. Replacement Parts List -------------------------------- 61
15.2. Accessories and Packing Material ------------------ 60
15.3. Replacement Parts List -------------------------------- 61
15.3.1. Cabinet and Electrical Parts---------------------- 61
15.3.2. Accessories and Packing Materials ------------ 61
15.3.3. BBS-S Card Parts ---------------------------------- 62
15.3.4. BB-EXP Board Parts ------------------------------- 67
15.3.5. Fixtures and Tools ---------------------------------- 67
15.3.2. Accessories and Packing Materials ------------ 61
15.3.3. BBS-S Card Parts ---------------------------------- 62
15.3.4. BB-EXP Board Parts ------------------------------- 67
15.3.5. Fixtures and Tools ---------------------------------- 67
3
KX-TDA620 Series
1 Safety Precautions
1. Before servicing, unplug the AC power cord to prevent an electric shock.
2. When replacing parts, use only the manufacturer's recommended components.
3. Check the condition of the power cord. Replace if wear or damage is evident.
4. After servicing, be sure to restore the lead dress, insulation barriers, insulation papers, shields, etc.
5. Before returning the serviced equipment to the customer, be sure to perform the following insulation resistance test to prevent
the customer from being exposed to shock hazards.
1.1.
For Service Technicians
• Repair service shall be provided in accordance with repair technology information such as service manual so as to prevent fires,
injury or electric shock, which can be caused by improper repair work.
1. When repair services are provided, neither the products nor their parts or members shall be remodeled.
2. If a lead wire assembly is supplied as a repair part, the lead wire assembly shall be replaced.
3. FASTON terminals shall be plugged straight in and unplugged straight out.
2. If a lead wire assembly is supplied as a repair part, the lead wire assembly shall be replaced.
3. FASTON terminals shall be plugged straight in and unplugged straight out.
• ICs and LSIs are vulnerable to static electricity.
When repairing, the following precautions will help prevent recurring malfunctions.
1. Cover plastic parts boxes with aluminum foil.
2. Ground the soldering irons.
3. Use a conductive mat on worktable.
4. Do not grasp IC or LSI pins with bare fingers.
2. Ground the soldering irons.
3. Use a conductive mat on worktable.
4. Do not grasp IC or LSI pins with bare fingers.
2 Warning
2.1.
Information for Users on Collection and Disposal of Old Equipment and
used Batteries
used Batteries
4
KX-TDA620 Series
2.2.
Battery Caution
1. Danger of explosion if battery is incorrectly replaced. Replace only with the same or equivalent type recommended by the
manufacturer. Dispose of used batteries according to the manufacturer's lnstructions.
2. The lithium battery is a critical component (type No.CR23541). Please observe for the proper polarity and the exact location
when replacing it and soldering the replacement lithium battery in.
2.3.
Caution
The power socket wall outlet should be located near this equipment and be easily accessible.
2.4.
About Lead Free Solder (PbF: Pb free)
Note:
In the information below, Pb, the symbol for lead in the periodic table of elements, will refer to standard solder or solder that con-
tains lead.
We will use PbF when discussing the lead free solder used in our manufacturing process which is made from Tin, (Sn), Silver,
(Ag), and Copper, (Cu).
This model, and others like it, manufactured using lead free solder will have PbF stamped on the PCB. For service and repair
work we suggest using the same type of solder.
Caution
• PbF solder has a melting point that is 50° ~ 70° F, (30° ~ 40°C) higher than Pb solder. Please use a soldering iron with tempera-
ture control and adjust it to 700° ± 20° F, (370° ± 10°C).
Exercise care while using higher temperature soldering irons.:
Do not heat the PCB for too long time in order to prevent solder splash or damage to the PCB.
Exercise care while using higher temperature soldering irons.:
Do not heat the PCB for too long time in order to prevent solder splash or damage to the PCB.
• PbF solder will tend to splash if it is heated much higher than its melting point, approximately 1100°F, (600°C).
• When applying PbF solder to double layered boards, please check the component side for excess which may flow onto the
• When applying PbF solder to double layered boards, please check the component side for excess which may flow onto the
opposite side (See figure, below).
2.4.1.
Suggested PbF Solder
There are several types of PbF solder available commercially. While this product is manufactured using Tin, Silver, and Copper,
(Sn+Ag+Cu), you can also use Tin and Copper, (Sn+Cu), or Tin, Zinc, and Bismuth, (Sn+Zn+Bi). Please check the manufac
turer's specific instructions for the melting points of their products and any precautions for using their product with other
materials.
The following lead free (PbF) solder wire sizes are recommended for service of this product: 0.3mm, 0.6mm and 1.0mm.
2.5.
Discarding of P. C. Board
When discarding P. C. Board, delete all personal information such as telephone directory and caller list or scrap P. C. Board.

