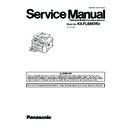
Panasonic KX-FLB883RU Service Manual ▷ View online
ORDER NO. KMF0711139CE
Flat-Bed Multi-Function Device
Model No.
KX-FLB883RU
(for Russia)
2
KX-FLB883RU
TABLE OF CONTENTS
PAGE
PAGE
1 Safety Precautions -----------------------------------------------4
1.1. For Service Technicians ----------------------------------4
1.2. AC Caution---------------------------------------------------4
1.3. Personal Safety Precautions ----------------------------5
1.4. Service Precautions ---------------------------------------5
1.2. AC Caution---------------------------------------------------4
1.3. Personal Safety Precautions ----------------------------5
1.4. Service Precautions ---------------------------------------5
2 Warning --------------------------------------------------------------6
2.1. About Lead Free Solder (PbF: Pb free) --------------6
2.2. Discarding of P. C. Board --------------------------------6
2.3. Insulation Resistance Test -------------------------------7
2.4. Battery Caution ---------------------------------------------7
2.5. LASER BEAM AND FUSER UNIT SECTION ------7
2.2. Discarding of P. C. Board --------------------------------6
2.3. Insulation Resistance Test -------------------------------7
2.4. Battery Caution ---------------------------------------------7
2.5. LASER BEAM AND FUSER UNIT SECTION ------7
3 Specifications ------------------------------------------------------8
4 General/Introduction ---------------------------------------------9
4 General/Introduction ---------------------------------------------9
4.1. Optional Accessories--------------------------------------9
4.2. Translation Lists --------------------------------------------9
4.2. Translation Lists --------------------------------------------9
5 Features ------------------------------------------------------------ 11
5.1. General Features----------------------------------------- 11
5.2. Hardware Requirements for Multi-Function
5.2. Hardware Requirements for Multi-Function
Software ---------------------------------------------------- 11
6 Technical Descriptions---------------------------------------- 12
6.1. Connection Diagram------------------------------------- 12
6.2. General Block Diagram--------------------------------- 13
6.3. Main Board Section-------------------------------------- 15
6.4. NCU Section----------------------------------------------- 29
6.5. ITS (Integrated telephone System) and
6.2. General Block Diagram--------------------------------- 13
6.3. Main Board Section-------------------------------------- 15
6.4. NCU Section----------------------------------------------- 29
6.5. ITS (Integrated telephone System) and
Monitor Section ------------------------------------------- 30
6.6. CIS Control Section-------------------------------------- 31
6.7. Motor Drive Section-------------------------------------- 32
6.8. Timing Chart and Wave Form of Scanner
6.7. Motor Drive Section-------------------------------------- 32
6.8. Timing Chart and Wave Form of Scanner
Motors------------------------------------------------------- 36
6.9. FAN Motor Section--------------------------------------- 39
6.10. Solenoid Driver Section -------------------------------- 41
6.11. LSU (Laser Scanning Unit) Section ----------------- 42
6.12. Sensors and Switches Section ----------------------- 44
6.13. Operation Board Section ------------------------------- 54
6.14. LCD Section ----------------------------------------------- 55
6.15. HVPS (High Voltage Power Supply) Section------ 56
6.16. Heat Lamp Control Circuit ----------------------------- 58
6.17. Main Board Section-------------------------------------- 64
6.18. Power Supply Board Section-------------------------- 69
6.19. Mechanical Operation----------------------------------- 70
7 Location of Controls and Components------------------ 72
7.1. Overview --------------------------------------------------- 72
7.2. Control Panel---------------------------------------------- 73
7.2. Control Panel---------------------------------------------- 73
8 Installation Instructions--------------------------------------- 74
8.1. Installation-------------------------------------------------- 74
8.2. Connections ----------------------------------------------- 87
8.2. Connections ----------------------------------------------- 87
9 Operating Instructions ---------------------------------------- 88
9.1. Your Logo ------------------------------------------------- 88
10 Test Mode---------------------------------------------------------- 90
10.1. Test Functions--------------------------------------------- 90
11 Service Mode ----------------------------------------------------- 94
11.1. Programming and Lists --------------------------------- 94
11.2. User Mode (The list below is an example of
11.2. User Mode (The list below is an example of
the SYSTEM SETUP LIST the unit prints out.---- 98
11.3. Service Mode Settings (Example of a printed
out list) ---------------------------------------------------- 100
11.4. History (Example of a printed out list)------------- 101
12 Troubleshooting Guide --------------------------------------104
12.1. User Recoverable Errors -----------------------------104
12.2. Remote Programming ---------------------------------106
12.3. Troubleshooting Details ------------------------------- 110
12.4. Document Jams (Auto Document Feeder)-------193
12.5. Recording Paper Jam ---------------------------------195
12.2. Remote Programming ---------------------------------106
12.3. Troubleshooting Details ------------------------------- 110
12.4. Document Jams (Auto Document Feeder)-------193
12.5. Recording Paper Jam ---------------------------------195
13 Service Fixture & Tools--------------------------------------200
14 Disassembly and Assembly Instructions -------------201
14 Disassembly and Assembly Instructions -------------201
14.1. Lower Cabinet Section --------------------------------202
14.2. Top Cover Section--------------------------------------203
14.3. Sorter Section -------------------------------------------204
14.4. Remove the Left Side Cabinet Section (1) -------205
14.5. Remove the Right Side Cabinet Section ---------206
14.6. Remove the Bottom Plate ----------------------------207
14.7. Remove the Left Side Cabinet Section (2) -------208
14.8. Remove the Bottom Cabinet Section-------------- 209
14.9. Remove the Main Board ------------------------------210
14.10. Remove the Mirror-------------------------------------- 211
14.11. Remove the High Voltage Power Board ----------212
14.12. Remove the Laser Unit--------------------------------213
14.13. Remove the Pick Up Roller -------------------------214
14.14. Remove the Fuser Unit and the Sorter Unit -----215
14.15. Remove the Fuser Unit Parts------------------------216
14.16. Remove the Top Cover Section---------------------217
14.17. Remove the Operation Panel and Board ---------218
14.18. Remove the Scanner Glass Cover-----------------219
14.19. Remove the Scanner Section -----------------------220
14.20. Remove the Multi Roller -----------------------------221
14.21. Remove the Transfer Roller Unit -------------------222
14.22. Remove the Eject Support Roller Guide
Holder -----------------------------------------------------223
14.23. Remove the Main Gear Unit -------------------------224
14.24. Remove the ADF Top Cover-------------------------225
14.25. Remove the ADF Unit ---------------------------------227
14.26. Remove the ADF Parts--------------------------------228
14.27. Remove the Sorter Unit Parts -----------------------229
14.28. Installation Position of The Lead--------------------231
15 Maintenance-----------------------------------------------------235
15.1. Maintenance Items and Component Locations -235
15.2. Maintenance ---------------------------------------------237
15.3. Printing Operation Principle--------------------------244
15.4. Terminal Guide of The ICs Transistors and
15.2. Maintenance ---------------------------------------------237
15.3. Printing Operation Principle--------------------------244
15.4. Terminal Guide of The ICs Transistors and
Diodes -----------------------------------------------------249
15.5. How to Replace the Flat Package IC -------------- 251
15.6. Main Board Section ------------------------------------253
15.7. Test Chart-------------------------------------------------255
15.6. Main Board Section ------------------------------------253
15.7. Test Chart-------------------------------------------------255
16 Schematic Diagram -------------------------------------------257
16.1. For Schematic Diagram------------------------------- 257
16.2. Main Board (1)-------------------------------------------258
16.3. Main Board (2)-------------------------------------------262
16.4. Main Board (3)-------------------------------------------264
16.5. Main Board (4)-------------------------------------------266
16.6. Main Board (5)-------------------------------------------268
16.7. Operation Board ----------------------------------------270
16.8. Sensor Board --------------------------------------------271
16.9. Relay Board----------------------------------------------272
16.10. Hook Switch Board-------------------------------------273
17 Printed Circuit Board-----------------------------------------275
3
KX-FLB883RU
17.1. Main Board ----------------------------------------------- 275
17.2. Operation Board ---------------------------------------- 277
17.3. Sensor Board -------------------------------------------- 279
17.4. Relay Board---------------------------------------------- 281
17.5. Hook Switch Board------------------------------------- 283
17.2. Operation Board ---------------------------------------- 277
17.3. Sensor Board -------------------------------------------- 279
17.4. Relay Board---------------------------------------------- 281
17.5. Hook Switch Board------------------------------------- 283
18 Exploded View and Replacement Parts List --------- 284
18.1. Cabinet, Mechanical and Electrical Parts
Location --------------------------------------------------- 284
18.2. Replacement Parts List ------------------------------- 304
4
KX-FLB883RU
1 Safety Precautions
1. Before servicing, unplug the AC power cord to prevent an electric shock.
2. When replacing parts, use only the manufacturer's recommended components.
3. Check the condition of the power cord. Replace if wear or damage is evident.
4. After servicing, be sure to restore the lead dress, insulation barriers, insulation papers, shields, etc.
5. Before returning the serviced equipment to the customer, be sure to perform the following insulation resistance test to prevent
the customer from being exposed to shock hazards.
1.1.
For Service Technicians
• Repair service shall be provided in accordance with repair technology information such as service manual so as to pre-
vent fires, injury or electric shock, which can be caused by improper repair work.
1. When repair services are provided, neither the products nor their parts or members shall be remodeled.
2. If a lead wire assembly is supplied as a repair part, the lead wire assembly shall be replaced.
3. FASTON terminals shall be plugged straight in and unplugged straight.
2. If a lead wire assembly is supplied as a repair part, the lead wire assembly shall be replaced.
3. FASTON terminals shall be plugged straight in and unplugged straight.
• ICs and LSIs are vulnerable to static electricity.
When repairing, the following precautions will help prevent recurring malfunctions.
1. Cover plastic parts boxes with aluminum foil.
2. Ground the soldering irons.
3. Use a conductive mat on worktable.
4. Do not grasp IC or LSI pins with bare fingers.
2. Ground the soldering irons.
3. Use a conductive mat on worktable.
4. Do not grasp IC or LSI pins with bare fingers.
1.2.
AC Caution
For safety, before closing the lower cabinet, please make sure of the following precautions.
1. The earth lead is fixed with the screw.
2. The AC connector is connected properly.
2. The AC connector is connected properly.

