LG V-3310T Service Manual ▷ View online
SPECIFICATIONS
• MODEL : V-3310/D/L/T, V-3340/D/T
• POWER SOURCE : ON RATING PLATE
• POWER CONSUMPTION : ON RATING PLATE
• POWER CONTROL :
- MAIN : PUSH ON/OFF
(V-3310/D/LT, V-3340/D/T, TURBO 3100/B)
- SUB : VACUUM POWER ADJUSTMENT BY
SLIDE KNOB
• CAPACITY : 3.3
L
• CORD LENGTH : 5 m
• HOSE LENGTH : 1.5 m, 1.3 m
• NET WEIGHT : 4 kg
• PACKING WEIGHT : 6.2 kg
• NET DIMENSION : 284
×
433
×
231 (W
×
D
×
H)mm
• PACKING DIMENSION : 331
×
517
×
350 (with plastic, steel)
331
×
582
×
350 (with telescopic
pipe) (W
×
D
×
H)mm
• ATTACHMENTS
HOSE ......................................................................... 1EA
STEEL PIPE ASM ...................................................... 2EA
(V-3310D / 3314D)
TELESCOPIC PIPE ASM ........................................... 1EA
(V-3310T / 3340T)
PLASTIC PIPE ........................................................... 2EA
(V-3310 / 3340, TURBO 3100/B)
NOZZLE ASS’Y ...........................................................1EA
CREVICE TOOL ......................................................... 1EA
CLOTH BAG ASS’Y(OPTION).....................................1EA
EXTRA PAPER BAG ASM(PAPER, OPTION).............1EA
DUSTING BRUSH(OPTION)...................................... 1EA
UPHOLSTERY NOZZLE(OPTION) ............................ 1EA
• This specifications are subject to change according to the buyer's request.
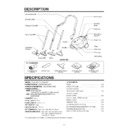
DESCRIPTION
- 4 -
Flexible Hose ASM
Dust Indicator
Switch Button
(ON/OFF)
(ON/OFF)
Power Cord
Body cover
Setting Hook
Cord Reel
Button
Button
Filter cover
Handle
Wheel
Suction
Telescopic Pipe ASM
Steel Pipe ASM
Plastic Pipe ASM
Slide Knob
Carpet Pedal
Tool ASM
Tool ASM
Nozzle ASM
Nozzle
DUSTING BRUSH
(OPTION)
UPHOLSTERY NOZZLE
(OPTION)
CLOTH BAG ASS'Y
(OPTION)
FILTER BAG ASS'Y
(OPTION)
CREVICE TOOL
ATTACHMENTS
CANISTER
• Almost all the parts of this vacuum cleaner can be
assembled with a screw driver and each connecting
component easily fits each other.
Disassemble one by one referring to the exploded view.
component easily fits each other.
Disassemble one by one referring to the exploded view.
• If possible, don’t disassemble except for the necessary
parts. It is not necessary to disassemble the parts that
are not detailed in the exploded view.
are not detailed in the exploded view.
1. Filter Cover Assembly Replacement
l) Grasp carrying handle and open filter cover by lifting set
hook.
2) Push the hinge side by inserting flat screw driver in
crack between hinge and body cover.
2. Indicator Assembly Replacement
1) Grasp indicator assembly and push it out in the direction
of the arrow.
2) Lift the indicator assembly.
3. Body Cover Assembly Replacement
1) Open the filter cover in the direction of arrow and
remove the two screws fastening the body base.
2) Lift body cover in the direction of the arrow.
3) Strip off the lead wires from the push switch.
DISASSEMBLY
- 1 -
NOTE: Before attempting to service or adjust any part of the vacuum cleaner, disconnect the electrical power supply cord
from the wall outlet.
Filter Cover
Set Hook
Carrying
Handle
Handle
Push Switch
Hinge
4. Push Switch Assembly Replacement
1) Push the s/w button hook in the direction of the arrow.
2) Push the push switch down grasping the wings of push
switch by long nose.
5. Motor Assembly Replacement
• Lift the motor assembly in direction of the arrow after
stripping off the lead wires.
6. Cord Reel Assembly Replacement
• Lift the cord reel assembly from the body base in direction
of the arrow.
- 2 -
Cord Reel
Button
Button
Push Switch
Long Nose
Motor Asm
Cord Reel Asm
• Almost all the parts of this vacuum cleaner can be
assembled with a screw driver and each connecting
component easily fits each other.
Disassemble one by one referring to the exploded view.
component easily fits each other.
Disassemble one by one referring to the exploded view.
• If possible, don’t disassemble except for the necessary
parts. It is not necessary to disassemble the parts that
are not detailed in the exploded view.
are not detailed in the exploded view.
1. Filter Cover Assembly Replacement
l) Grasp carrying handle and open filter cover by lifting set
hook.
2) Push the hinge side by inserting flat screw driver in
crack between hinge and body cover.
2. Indicator Assembly Replacement
1) Grasp indicator assembly and push it out in the direction
of the arrow.
2) Lift the indicator assembly.
3. Body Cover Assembly Replacement
1) Open the filter cover in the direction of arrow and
remove the two screws fastening the body base.
2) Lift body cover in the direction of the arrow.
3) Strip off the lead wires from the push switch.
DISASSEMBLY
- 1 -
NOTE: Before attempting to service or adjust any part of the vacuum cleaner, disconnect the electrical power supply cord
from the wall outlet.
Filter Cover
Set Hook
Carrying
Handle
Handle
Push Switch
Hinge

