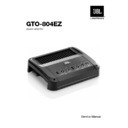
JBL GTO-804EZ Service Manual ▷ View online
Service Manual
GTO-804EZ
power amplifier
GTO-804EZ
- CONTENTS -
SPECIFICATIONS ………………………………………..2
CONNECTIONS……………………………………………3
BASIC TROUBLESHOOTING… ………………..……....8
PACKAGING EXPLODED VIEW ……………................9
EXPLODED VIEW …..………....…….….….…………....10
ELECTRICAL PARTS LIST……………………………...11
PCB DRAWINGS…………….……….……….…….……22
BLOCK DIAGRAM…………………………....….....……25
SCHEMATIC………..….…….……………….…...….…..26
SPECIFICATIONS
GTO-804EZ
Number of Channels:
4
Power Output (CEA 2006A):
80W RMS x 4 channels at 4 ohms, 14.4V DC, <1.0% THD
100W RMS x 4 channels at 2 ohms, 14.4V DC, <1.0% THD
200W RMS x 2 channels bridged at 4 ohms, 14.4V DC, <1.0% THD
Max Power:
940W: 235W x 4 channels at 2 ohms (1kHz), 15.5V DC, 10% THD
Frequency Response:
20Hz – 23kHz (±0.5dB)
Crosstalk:
> 50dB @ 1kHz
Signal-to-Noise (@ 1W):
> 85dB
Maximum Current Draw:
60A
Fuse Replacement:
25A x 2
Dimensions (D x H x W):
11-15/16" x 2-9/16" x 9-11/16" (302mm x 66mm x 246mm)
Weight:
8.4 lb (3.8kg)
2
GTO-804EZ
CONNECTING THE POWER AND GROUND
The GTO series amplifiers are capable of delivering extremely high power levels, and require a heavy-duty and
reliable connection to the vehicle’s electrical system to achieve optimal performance. Please adhere to the following
instructions carefully.
reliable connection to the vehicle’s electrical system to achieve optimal performance. Please adhere to the following
instructions carefully.
Using the Connectors
GTO series amplifiers use the same type of screw terminals for power and speaker connections. This type of terminal
is easy to use, provides superior current transfer and allows the easy connection of large-gauge wire.
is easy to use, provides superior current transfer and allows the easy connection of large-gauge wire.
To use the connectors, use a Phillips screwdriver to loosen the connector’s set screw, insert the bare wire and tighten
the set screw to secure the wire in the connector.
the set screw to secure the wire in the connector.
Loosen
Screw
Insert
Wire
Tighten
Screw
Ground Connection
Connect a wire (minimum 8AWG – 8.4mm
2
– for the GTO-804EZ; minimum 10AWG – 5.3mm
2
– for the GTO-504EZ)
from the amplifier’s GND terminal directly to a solid point on the vehicle’s chassis. For a good connection, use
sandpaper to clear the paint from the metal surface at this chassis location. Use a star-type lock washer to secure the
wire’s connection.
sandpaper to clear the paint from the metal surface at this chassis location. Use a star-type lock washer to secure the
wire’s connection.
Power
Connectors
Audio System Head Unit
Remote Turn-On (optional)
> #18 AWG (0.82mm
2
) Wire
> #8AWG (13.2mm
2
) Wire – GTO-804EZ
> #10AWG (5.3mm
2
) Wire – GTO-504EZ
+12V
18"
(46cm)
> #8AWG (13.2mm
2
) Wire – GTO-804EZ
> #10AWG (5.3mm
2
) Wire – GTO-504EZ
50A Fuse (GTO-804EZ)
40A Fuse (GTO-504EZ)
40A Fuse (GTO-504EZ)
Chassis Ground
(bare metal)
(bare metal)
3
GTO-804EZ
Power Connection
1. Connect a wire (minimum 8AWG – 8.4mm
2
– for the GTO-804EZ; minimum 10AWG – 5.3mm
2
– for the
GTO-504EZ) directly to the battery’s positive (+) terminal.
2. Install a fuse holder for a 50A fuse (GTO-804EZ) or 40A fuse (GTO-504EZ) on this wire within 18" (46cm) of the
battery’s (+) terminal. Do not install the fuse in the holder at this time.
3. Route this wire to the amplifier’s location and connect it to the amplifier’s +12V terminal. Be sure to use
appropriate grommets whenever routing wires through the firewall or other sheet metal. IMPORTANT: Failure to
adequately protect the positive wire from potential damage may result in a vehicle fire.
adequately protect the positive wire from potential damage may result in a vehicle fire.
4. When you are finished routing and connecting this wire, install the appropriate fuse in the holder you installed near
the battery. (GTO-804EZ – 50A fuse; GTO-504EZ – 40A fuse.)
SPEAKER CONNECTIONS
Always connect the (+) terminal on the amplifier to the (+) terminal on the speaker and the (–) terminal on the amplifier
to the (–) terminal on the speaker.
to the (–) terminal on the speaker.
Speaker
Connectors
IMPORTANT: Make sure the (+) and (–) bare wires do not touch each other or the other terminal at both the amplifier
terminals and speaker terminals. Touching wires can cause a short circuit that can damage the amplifier.
terminals and speaker terminals. Touching wires can cause a short circuit that can damage the amplifier.
NOTE: The minimum speaker impedance for stereo operation is 2 ohms. The minimum speaker impedance for bridged
operation is 4 ohms.
operation is 4 ohms.
Stereo operation
• Connect the front speakers to the FL and FR (+) and (–) terminals.
• Connect the rear speakers to the RL and RR (+) and (–) terminals.
Front Left Speaker
Rear Left Speaker
Front Right Speaker
Rear Right Speaker
4

