Harman Kardon CDR 2 (serv.man5) Service Manual / Technical Bulletin ▷ View online
1
harman/kardon
John M. Rico
Technical Document Supervisor
Harman Consumer Group
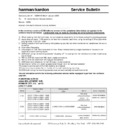
CDR2 SOFTWARE UPGRADE PROCEDURE (PC only)
(UUT = Unit Under Test)
NOTE: Besides checking the serial number on the unit, it can be determined if the unit has the older version
of the software (and needs to be upgraded) by the following test:
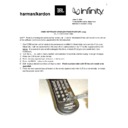
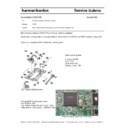
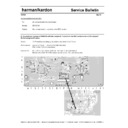
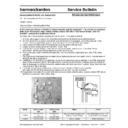
1) One CDR2 remote control needs to be permanently modified for these tests; cut a section of the outer
foilcal label (with an exacto knife) in the area of the buttons between the “0” on the keypad and the A-B
button. It is easiest to cut a small rectangular flap there, instead of trying to cut a small circle (see
illustration)
button. It is easiest to cut a small rectangular flap there, instead of trying to cut a small circle (see
illustration)
2) Turn the UUT on, with no discs inserted. Let it stabilize 30 seconds until the display no longer changes.
3) Press the CDP button on the remote.
4) Press the now-exposed special button on the remote.
5) Press the PROG. button on the remote.
6) Both displays should now show a 6 digit number. If both numbers start with 99 the unit needs to be
3) Press the CDP button on the remote.
4) Press the now-exposed special button on the remote.
5) Press the PROG. button on the remote.
6) Both displays should now show a 6 digit number. If both numbers start with 99 the unit needs to be
upgraded.
7) Press the now-exposed special button on the remote again to return the UUT to a normal state, or simply
turn the power button OFF.
2
UPGRADE PROCEDURE
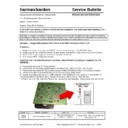
The CDR2 Upgrade Procedure consists of a computer-aided software change to the UUT by a supplied
interface board connected to the serial port (COM1 on most computers) and plugging a molex connector on
the opposite end of the board into the CDR2. The computer should be a PC, no system requirements I know
of other than should be running any version of Windows.
1) CDP (Play deck) upgrade:
a)
Turn the UUT upside down, on a padded surface. It should be plugged in, but turned OFF.
b)
The interface board should now be the correctly connected to the serial port on the computer.
c)
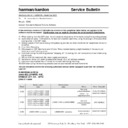
Connect the molex connector on the opposite end of the board into the UUT; the 6 pin connector is
exposed and is near the middle of the bottom panel.
d)
Turn the UUT ON with the power button.
e)
Start the software procedure on the computer; the upgrade will take approximately 6 minutes.
f)
After completed, computer monitor should display OK.
g)
Turn the UUT OFF. Unplug the molex connector from the UUT.
2) CDR (Record Deck) upgrade:
a)
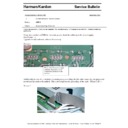
Remove the right front foot on the UUT to access the molex connector.
b)
Connect the interface board molex connector into the UUT; the 6 pin connector is in a recess, and may
require the help of a tool (like a small screwdriver) to mate with the female connector. USE CAUTION.
It’s easy to bend the pins by being too rough.
It’s easy to bend the pins by being too rough.
c)
Turn the UUT ON with the power button.
d)
Start the software procedure on the computer; the upgrade will take approximately 6 minutes.
e)
After completed, computer monitor should display OK.
f)
Turn the UUT OFF. Unplug the molex connector from the UUT.
g)
Replace the front foot.
3) Check that the upgrade has been successful by checking with a modified remote control with the
procedure at the top of page 1.
Display

